If your bifold doors won’t close properly, close them slowly and watch where they stop. A scraping corner needs a different fix from a door that closes smoothly, then pops open. Start with the symptom below.
This guide covers interior bifold closet doors with an overhead track, not exterior folding-glass doors.
Find Your Symptom First
Move clothing, storage bins, and rugs out of the folding path before testing.
| What happens? | Start here |
|---|---|
| The bottom scrapes the floor or carpet | 1. Check floor clearance |
| One edge rubs the frame, or the door hangs crooked | 2. Check hinges and pivot alignment |
| Double bifold doors collide in the middle or sit unevenly | 3. Check the center gap and aligners |
| The door closes, then pops open | 4. Check the closing snugger |
| The top guide catches or leaves the track | 5. Inspect the guide and track |
| Adjustments do not last, or the door has never fitted | 6. Check the mounting points and opening |
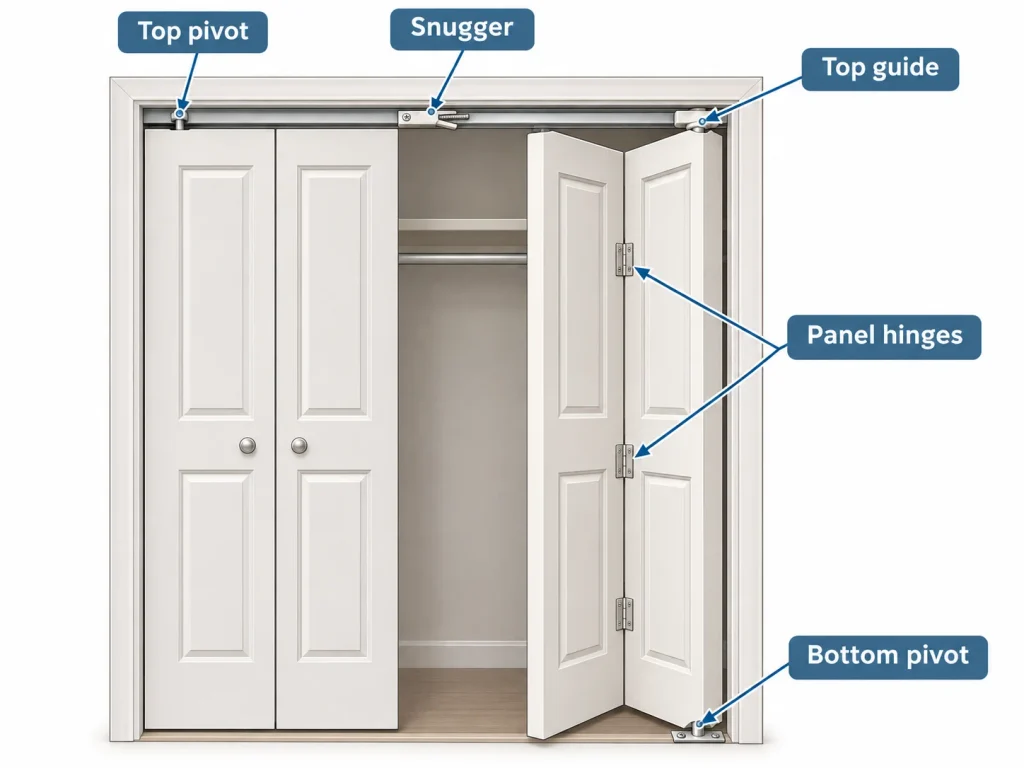
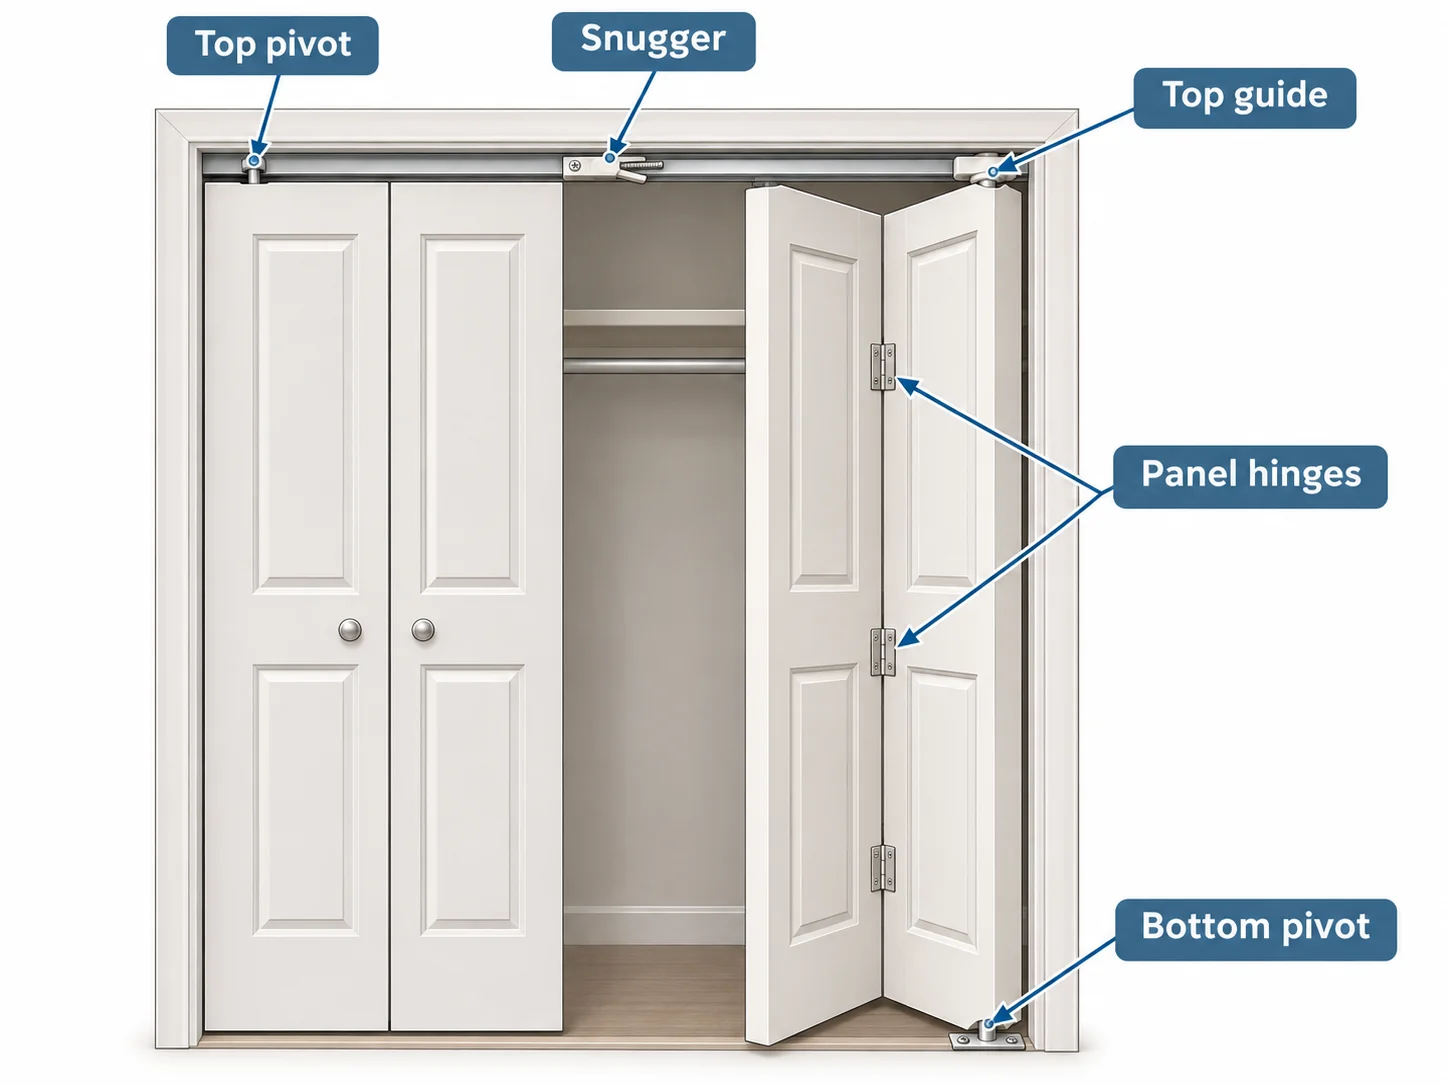
Before moving anything: Photograph the hardware and mark the current bracket positions with a pencil. Change one setting at a time, tighten it, and test again. Support the panels before releasing a pivot or its bracket; get someone to hold them if necessary.
The pivot is on the frame side of the door. The guide travels along the track at the moving top corner. Do not confuse a spring-loaded guide with a height adjuster. Some interior systems are top-hung rather than supported by an adjustable bottom pivot.
1. The Door Scrapes the Floor or Carpet
Watch whether the whole bottom edge drags or just one corner. If one corner scrapes and the door looks tilted, check pivot alignment as well as height.
For a door with a threaded, adjustable bottom pivot:
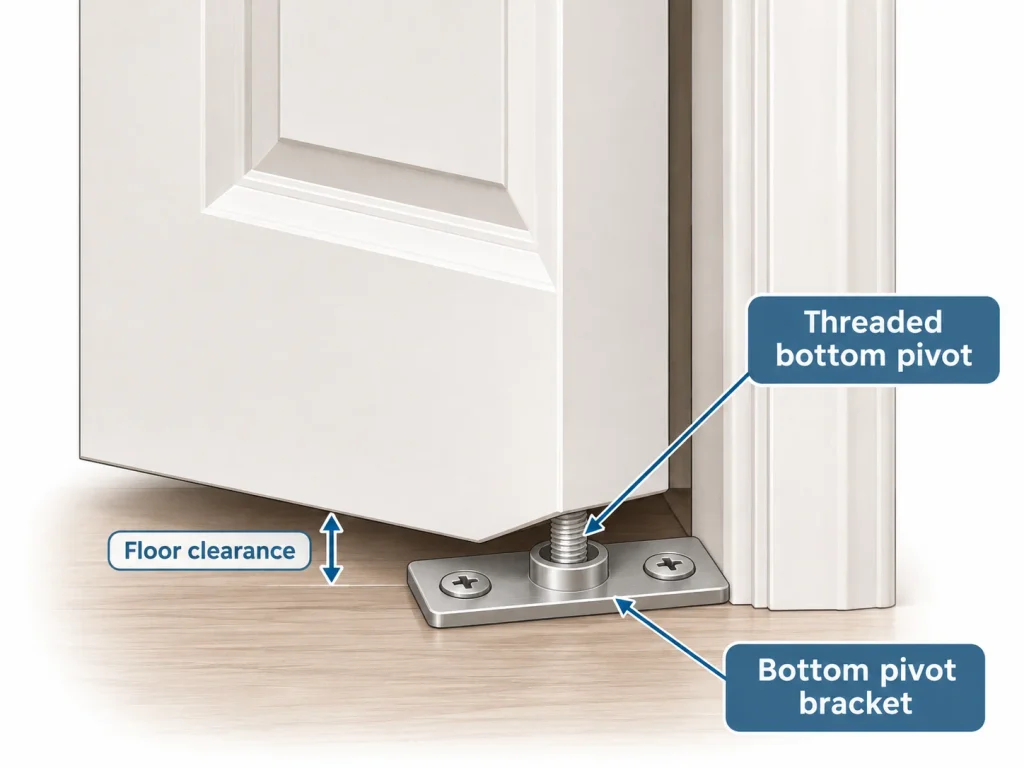
- Fold and support the panels. Lift the pivot clear of its bracket if that hardware requires it; do not force it to turn while loaded or locked in place.
- Make a small adjustment in the raising direction specified for that pivot. Do not assume every design uses the same turning direction.
- Reseat the pivot securely, then open and close the door through its full travel. Check both the floor clearance and the space below the top track.
Tip: If this started after new carpet or flooring, check the remaining opening height before trimming the door. Raising it is not a solution if the top then binds against the track.
2. The Door Rubs the Frame or Hangs Crooked
Close the door gently and compare the gap beside the pivot-side panel at the top and bottom. Identify the actual contact point before loosening anything.
Check the hinges first
Before adjusting the pivots, open the door halfway and check the hinges connecting the two panels. Look for loose screws, a hinge pulling away from the wood, or panels that no longer sit evenly together. Tighten loose screws gently and test the door again. If a screw spins without gripping, the mounting hole needs repair rather than repeated tightening.
Adjust the pivots only if the door still rubs
On hardware with a sliding top-pivot bracket, the adjustment screw is inside the track at the pivot, not one of the screws fastening the whole track to the opening.
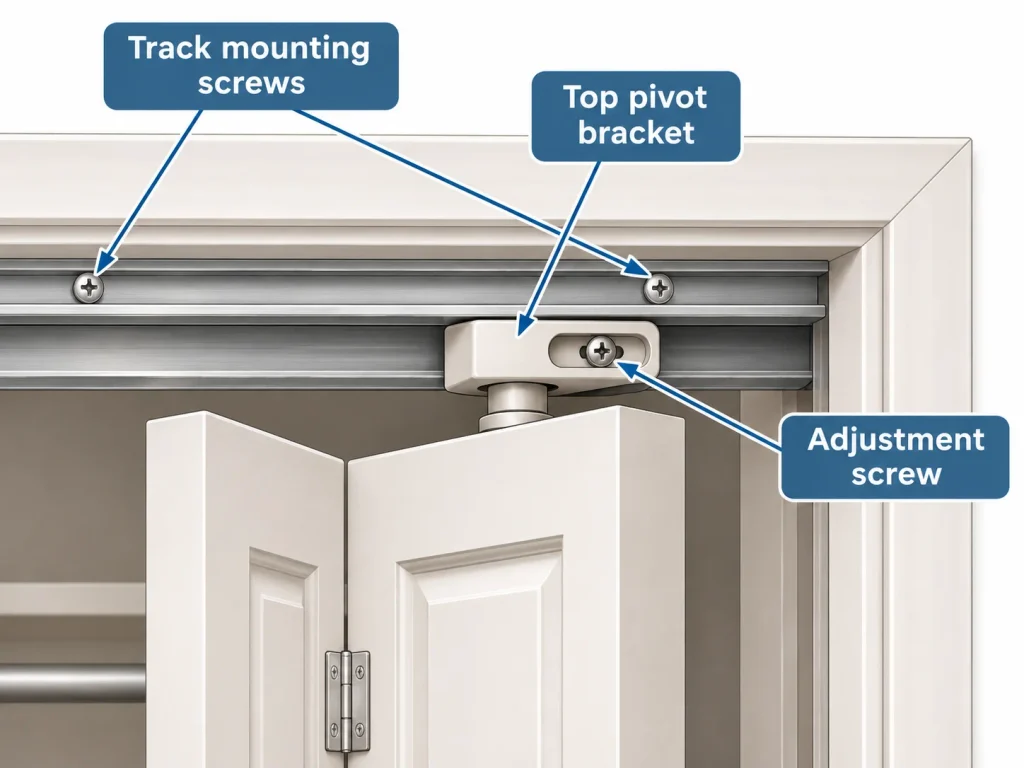
Support the panels and fold or remove them as needed for access. Loosen the bracket’s adjustment screw just enough to slide it. If the upper pivot-side corner rubs the jamb, move that bracket slightly away from the jamb, then tighten and retest.
Check the lower pivot position too. The upper and lower pivot points should line up vertically; adjusting only one end can leave the door tilted. Use the lower bracket’s approved sideways adjustment where needed.
Tip: Use a level rather than relying only on the visible gap. If the jamb itself leans or bows, an even-looking gap is not a reliable guide to a straight-hanging door.
3. Double Bifold Doors Hit in the Middle or Won’t Sit Flush
Try this comparison: fold the right-hand pair open and close the left pair by itself. Then reverse the test.
If each pair closes alone but they interfere when brought together, focus on the meeting edges and rear aligners. There is little reason to change the height of both sets before finding that contact point.
The edges collide
Check whether the center gap disappears at the top, bottom, or along its full height. A tapered gap calls for an alignment check first.
If both pairs are straight but meet too tightly, adjust their pivot positions slightly toward their respective outer jambs, preserving the hardware’s required side clearances. If there is no room to do that, move to Section 6 rather than forcing the doors apart.
One pair sits farther forward
Check the small aligner plates on the backs of the meeting panels, if fitted. Adjust their slotted mounts so the plates engage properly and bring the faces into line, then tighten. Watch that one plate is not catching the other and stopping closure.
4. The Door Closes, Then Pops Open
First separate two problems: does the door reach its closed position freely, or only when you push hard? If it needs force, return to the rubbing and center-gap checks. Do not use a stronger catch to fight a physical obstruction.
Before adjusting the snugger, check whether the pivot-side panel hangs straight. Misaligned pivots can sometimes keep the door from resting naturally in its closed position.
If the panels close freely but will not stay there, inspect the snugger, sometimes called a snubber. On systems that use one, this small component inside the upper track provides closing tension against the guide. Check that it is present, engaged correctly, and not visibly broken.
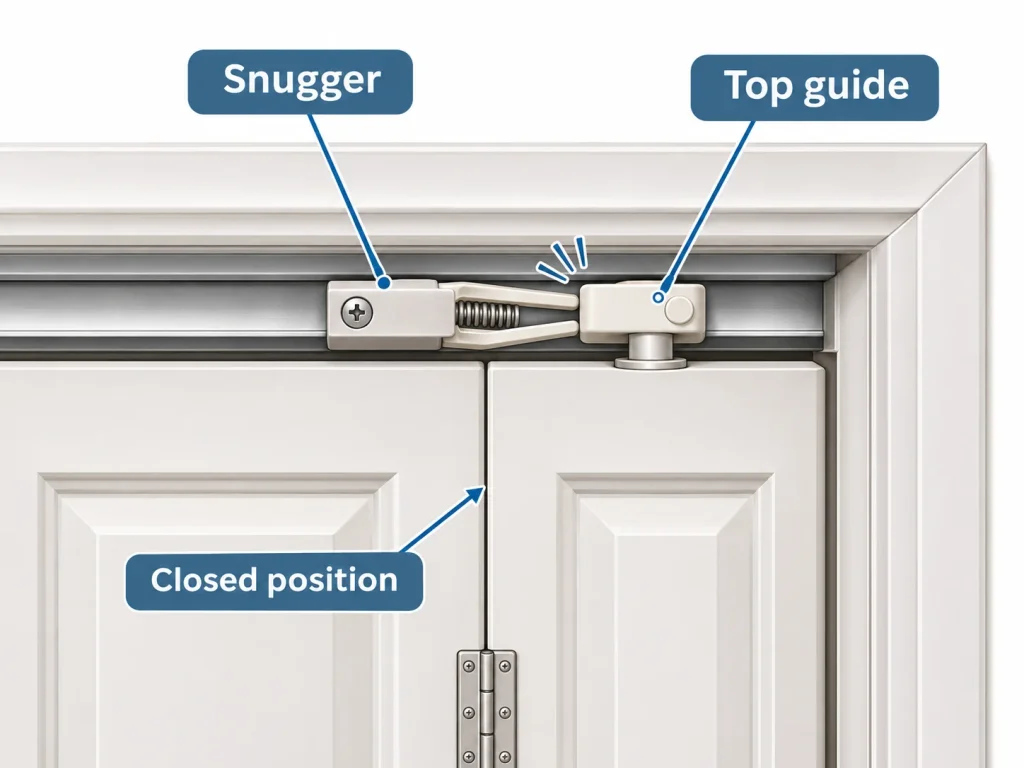
For a screw-adjustable version, mark its position before moving it. Make small changes using that hardware’s adjustment method, then tighten and retest. The aim is for the snugger to engage the guide without preventing the panels from closing flat.
Test: Close the door, release the handle, then open it again. You are looking for a gentle hold—not a hard shove to close or a struggle to reopen.
5. The Top Guide Catches or Comes Out of the Track
Watch the moving top corner as you close the door. Does the guide stop at one spot, or come out of the track?
If it catches at one spot: Inspect that section for debris, a protruding screw, or a visibly distorted track. Vacuum loose dirt and wipe the track clean, then dry it. Retest before changing the door alignment.
If it comes out: Support the door and check that the guide is properly seated. On a spring-loaded guide, look for a cracked wheel or a pin that no longer extends. Also check whether the door sits too low for reliable engagement. Repeatedly pushing the guide back into place does not identify why it escapes.
Match any replacement to the original roller diameter, profile, and mounting dimensions. Similar-looking guides are not necessarily interchangeable.
Tip: Clean first. Add lubricant only where the hardware maker specifies it; some systems do not need oil or grease.
6. Still Not Closing? Check Whether the Problem Is Bigger Than Adjustment
It works briefly, then drops or shifts again
Use your pencil marks to see whether a bracket has moved. If it has, investigate why its fastening is not holding instead of repeating the adjustment.
If the bracket stays put but the pivot tilts inside the door, inspect the surrounding material. A split pivot hole needs repair, not another height change. A compatible repair bracket can reinforce some split wooden door corners; match it to the door thickness and pivot arrangement.
The door has never closed correctly
Check the finished opening against the requirements for that exact door and hardware set. Use the space between the finished jambs and above the finished floor—not the bare framing dimensions. Check that the jambs are straight and the header is level.
The bifold door size chart and opening calculator can help organize those measurements before you decide whether the door, hardware, or opening needs to change.
Finish With a Full-Travel Test
Open the panels completely, then close them slowly several times. Let go of the handle to check that they stay closed. On double sets, try closing the left pair first, then the right pair first.
You are finished when the panels clear the floor and frame, the guides stay seated, and the doors close without lifting, slamming, or being held in place.