
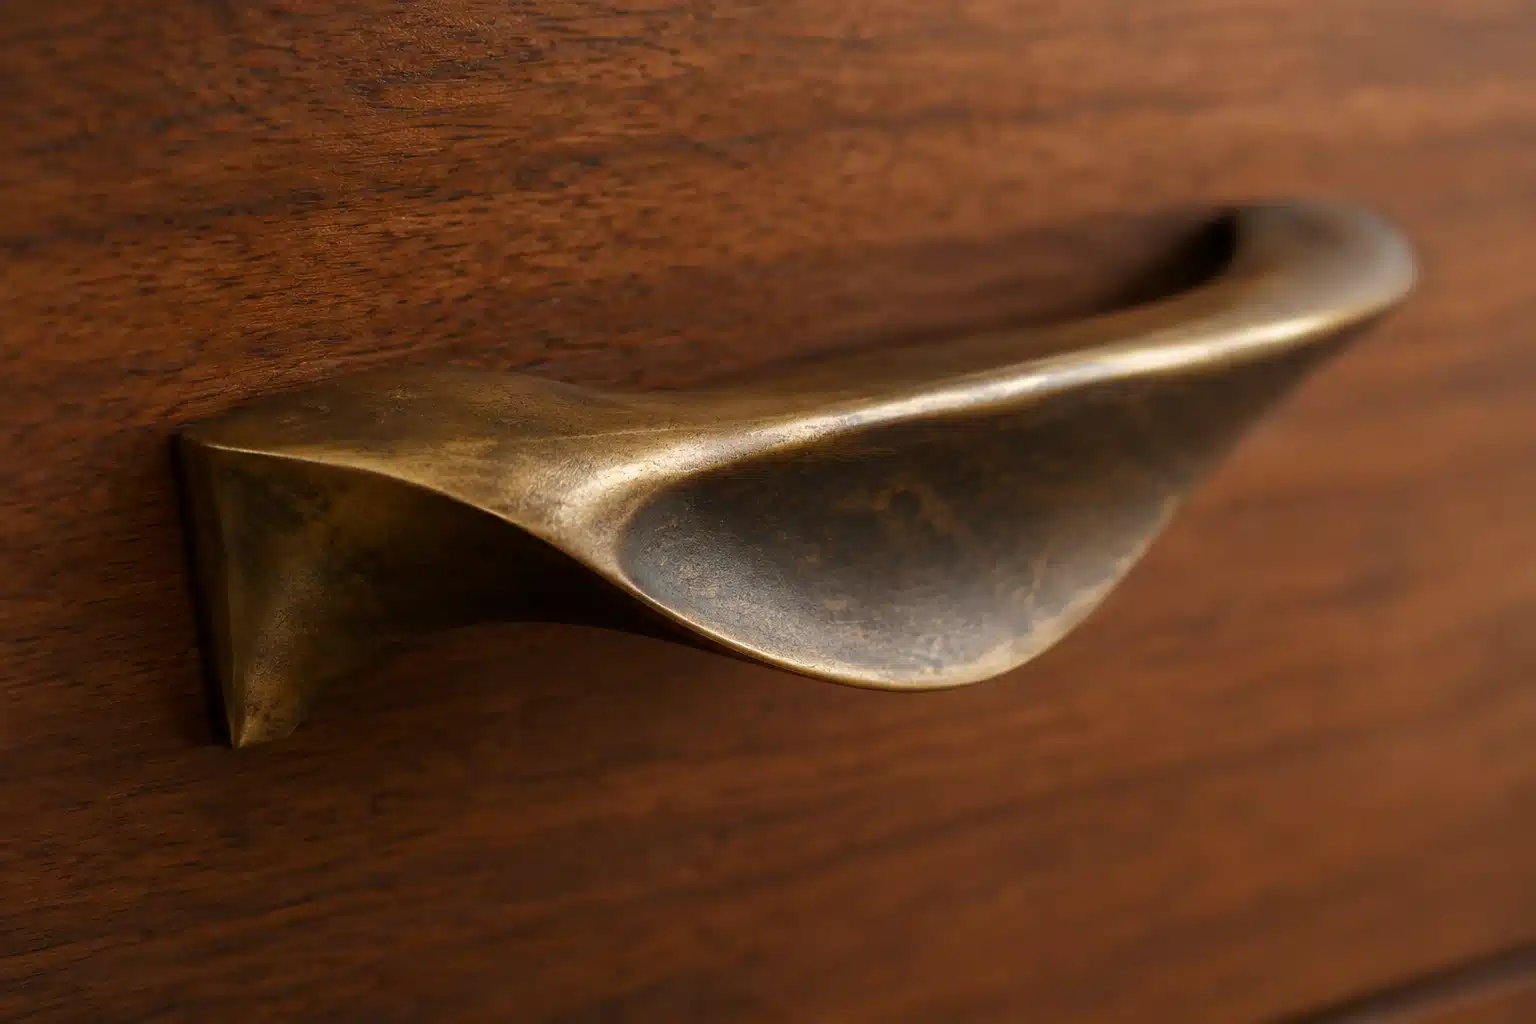
Mid-Century Modern (MCM) credenzas, dressers, and seating derive much of their value and aesthetic warmth from understated design elements. Among these, original brass hardware from sculpted drawer handles to tapered leg ferrules plays an essential role in defining the authentic period character of the piece. However, one of the most common mistakes in vintage furniture restoration is treating aged brass as if it were simply dirty modern metal that needs to be polished to a mirror shine.
Proper restoration requires distinguishing between unwanted surface grime and the soft, golden-brown oxidation (patina) that develops over sixty years. Cleaning vintage hardware should focus on removing grease, dirt, and active corrosion while preserving the metal’s natural age and original factory finish.
Dirt vs Character: Knowing When to Clean and When to Leave It Alone
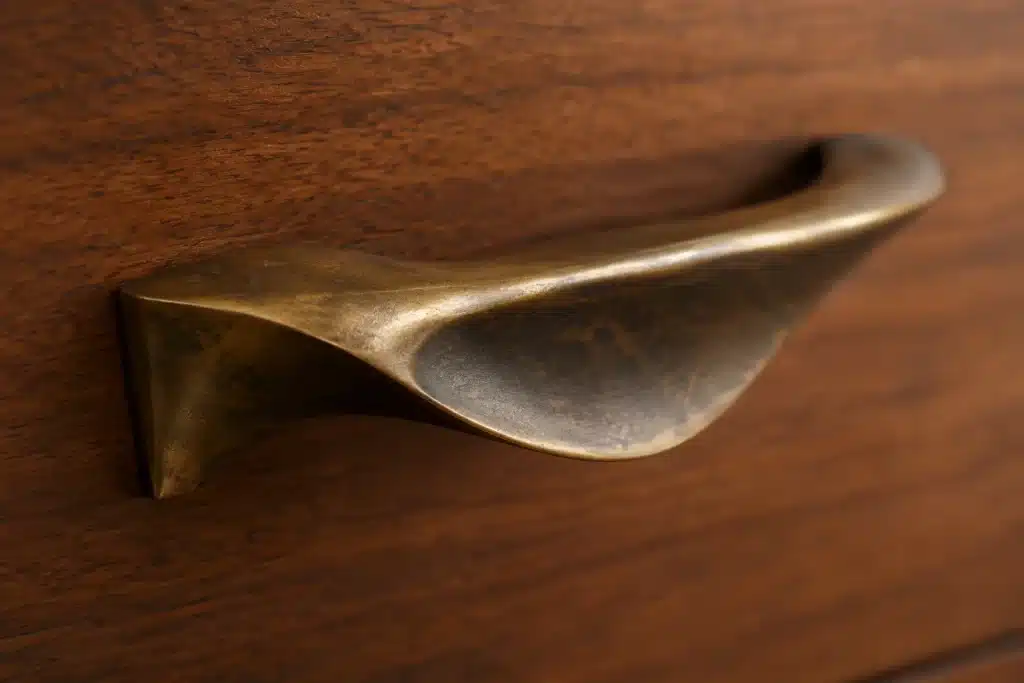
Understanding the distinction between accumulated grime and desirable oxidation is fundamental to conserving both the visual integrity and the secondary market appeal of mid-century furniture.
A Quick Visual Check: Distinguishing Grime from Desirable Aging
Before applying any cleaning agent or solvent, perform a quick visual and tactile inspection under bright, direct light:
- Desirable Patina: Appears as a smooth, uniform amber-to-bronze tonal shift embedded within the surface of the metal. It often wears down naturally along high-contact edges (where fingers regularly touch the handle) and remains slightly darker in recessed curves.
- Accumulated Grime: Consists of dark, tacky, or uneven buildup concentrated in crevices, around screw mounts, and along lower drawer edges. Grime feels sticky or rough and is composed of skin oils, airborne dust, aged wax, and old furniture polish.
Testing Tip: If a dark deposit feels tacky and can be gently scraped off using a soft wooden toothpick without scratching the metal beneath, it is surface grime. If the dark shading is hard, smooth, and integrated into the metal surface, it is stable oxidation. Remove the grime and leave the oxidation intact.
Why Over-Polishing May Reduce Collector Appeal
In the vintage resale market, buyers and collectors frequently value original finish over bright, reflective surfaces. Over-buffing vintage brass to a bright yellow shine often creates a jarring visual contrast when mounted against sixty-year-old walnut or teak veneer.
Furthermore, some mid-century hardware was originally finished at the factory with thin protective lacquers, subtle tonal glazes, or electroplated coatings rather than bare cast brass. Stripping these surfaces down to bright raw metal alters the original design intent. A piece with heavily polished, modified hardware may reduce its overall appeal to buyers seeking well-preserved original condition.
When You Should Leave Vintage Brass Alone
Restoration does not always require intervention. You should consider leaving the hardware unwashed if:
- The existing original lacquer coating remains intact and unchipped across the surface.
- The patina is dark but completely stable, smooth, and visually consistent across all drawer pulls.
- There is no sticky oil residue, active corrosion, or dirt buildup present.
- The hardware retains a documented, intentional factory-toned finish (often verified when cross-referencing an MCM maker’s mark guide for specific furniture lines).
If the hardware is structurally sound and the surface is stable, cleaning provides little practical benefit and introduces unnecessary handling risks.
Solid Brass vs. Plated Metal: Screening and Identification
Identifying the underlying material is a key step before attempting any physical or chemical cleaning. Treating thin brass plating with methods meant for solid brass can cause lasting surface damage.
| Feature | Solid Brass | Brass-Plated Steel or Zinc |
| Magnetic Attraction | Generally Non-Magnetic | Strong (if steel) or Non-Magnetic (if zinc) |
| Relative Weight | Noticeably heavy and dense | Lighter if zinc die-cast; heavy if thick steel |
| Scratch / Wear Profile | Pale yellow-gold metal throughout | Silver, grey, or reddish core beneath thin plating |
| Abrasion Tolerance | Moderate tolerance to gentle hand cleaning | Extremely low; plating layer can wear through quickly |
Magnet Screening and Physical Inspection
The magnet test serves as an effective initial screening tool, but it should not be relied upon as a definitive diagnostic:
- Magnet Screening: A strong magnetic response strongly suggests a steel or iron core beneath brass plating. However, brass-plated zinc (pot metal) is also non-magnetic, meaning a lack of magnetic pull does not automatically guarantee solid brass.
- Checking Mounting Threads and Recesses: Unbolt the handle and examine unplated interior areas, such as the inside of a screw hole or the back surface of a cast backplate. Exposed metal inside screw threads often reveals the core material.
- Evaluating Physical Weight: Cast solid brass handles possess a distinct heft in the palm. If a large, solid-looking mid-century handle feels unusually light, it may be hollow-formed brass or a die-cast zinc alloy.
Caveats in Metal Identification
While exposed yellowish metal inside a screw hole can support a solid-brass identification, color alone is not conclusive. Alloy compositions, surface oxidation, and historical casting methods can alter the interior appearance of vintage components. Conservation guidelines from institutions such as the Canadian Conservation Institute (CCI) emphasize using multiple physical characteristics including density, magnetic response, and wear patterns rather than relying on visual color assessment alone.
Plating Risk Assessment
Electroplated brass coatings on mid-century furniture are often only a few microns thick. Decades of atmospheric exposure and household cleaning can weaken the bond between the plating and the underlying core metal. Any aggressive friction, harsh polish, or chemical cleaner can quickly wear through this thin outer layer, exposing the grey zinc or steel substrate beneath. Once the plating is breached, repair requires complete industrial re-plating or hardware replacement.
The Gentle Micro-Cleaning Protocol
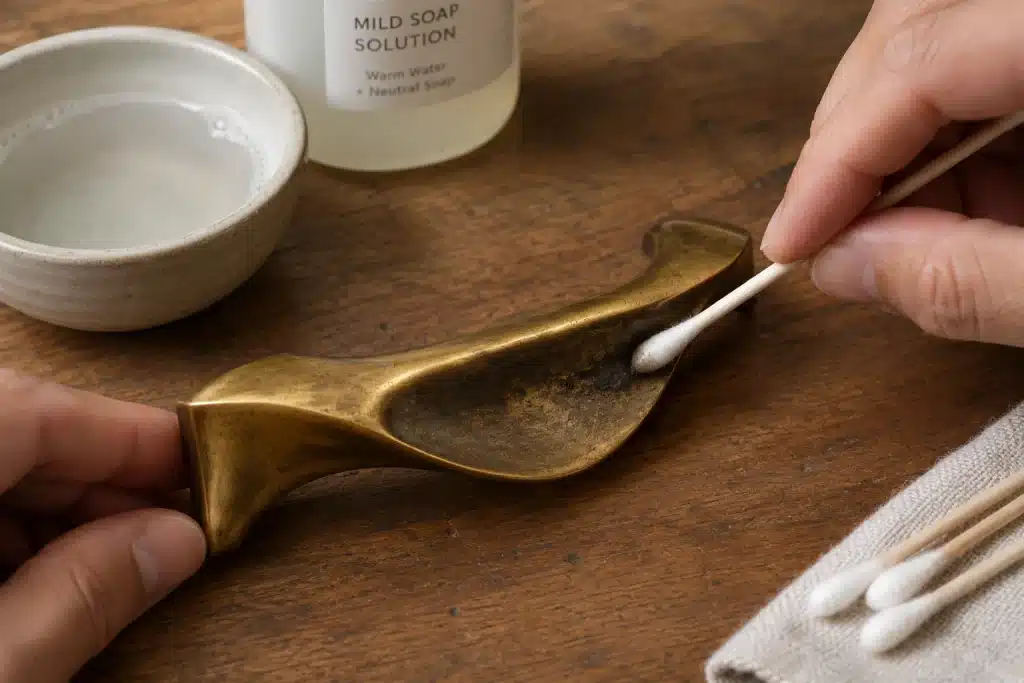
When cleaning vintage metal components, adopt a conservative approach: begin with the mildest cleaning technique and progress to more assertive methods only if persistent grime remains.
& Water Wash
Active Corrosion
Spot Treatment
Buffing
Step 1: Stripping Oils and Grime with Mild Soap Solutions
The majority of vintage hardware requires only the removal of surface oils and dirt, not aggressive metal polishing.
- Dismantle the Hardware: Always remove pulls, backplates, and ferrules from the wooden furniture before cleaning. Cleaning hardware while mounted risks trapping moisture or cleaning agents beneath the metal, which can bleed into raw wood or damage surrounding veneer.
- Soak in Warm Solution: Submerge the unbolted metal pieces in a plastic basin filled with warm water and a few drops of a mild, neutral dish soap (free from bleach, citrus additives, or abrasives) for 10 to 15 minutes to loosen dried grease.
- Gently Scrub Surfaces: Use a soft-bristled nylon brush (such as an ultra-soft toothbrush) to clean recessed lines and mounting edges. Avoid stiff plastic or wire bristles.
- Rinse and Dry Thoroughly: Rinse the components in clean, lukewarm water. Dry every piece immediately using a lint-free cotton cloth, paying special attention to blind screw holes to prevent internal moisture accumulation.
Step 2: Spot-Treating Active Green Corrosion Without Scratches
Green or blue-green corrosion products are sometimes described as verdigris, although copper-alloy corrosion can produce several different chemical compounds and appearances. Green deposits do not always represent catastrophic structural failure, but powdery, crumbly, or actively spreading green crusts can indicate active corrosion, which may be associated with moisture exposure and other corrosive conditions.
- Targeted Application: Dampen a cotton swab with standard 70% isopropyl alcohol or a warm, mild soap solution.
- Isolate the Buildup: Gently rub the swab directly over the powdery green deposit to soften it. Use a blunted wooden toothpick or bamboo skewer to carefully lift thick crusts away from tight corners without scratching the underlying metal.
- Preserve Surrounding Areas: Focus the treatment exclusively on the active green corrosion, leaving surrounding stable, dark oxidation intact.
Step 3: Microfiber Buffing Techniques That Respect Factory Textures
Some mid-century hardware pieces feature fine, factory-machined circular textures or directional brushed finishes. Random, circular rubbing with abrasive pads can flatten these delicate surface details.
Always wipe and dry the hardware following the direction of any visible factory grain lines. Use a clean, high-density microfiber cloth and apply light, straight strokes. This removes soapy residues and restores a soft, clean luster while preserving the metal’s original texture.
Long-Term Protection: Waxing vs. Sealing
After hardware has been cleaned, dried, and inspected, applying a protective barrier helps prevent rapid re-oxidation and shields the metal from skin oils during daily use.
Microcrystalline Wax: A Reversible Protective Finish
In museum conservation and fine furniture restoration, microcrystalline wax (such as Renaissance Wax) is widely recognized as a versatile, reversible protective option for copper-alloy artifacts.
- Reversibility: Microcrystalline wax can generally be removed at a later date using an appropriate solvent, such as mineral spirits, when compatible with surrounding finishes.
- Handling Protection: It leaves an extremely thin, moisture-resistant barrier that helps repel skin oils, preventing dark thumbprints from forming around contact points.
- Unobtrusive Barrier: Microcrystalline wax forms a thin, unobtrusive protective film that stabilizes the surface without adding an artificial, high-gloss shine.
- Application Guidelines: Apply a tiny amount of microcrystalline wax using a soft cotton cloth. Spread a paper-thin layer evenly over the metal, allow it to dry briefly until hazy (following the specific product manufacturer’s instructions for drying and buffing times), and buff lightly with a clean microfiber towel.
Safety Precaution: When using solvents like mineral spirits to clean or remove wax near furniture, ensure the hardware is completely removed from the wood. Solvents can damage wood finishes, lacquers, and underlying veneers if accidental contact occurs. Always test solvents in an inconspicuous area first.
When to Consider Lacquer
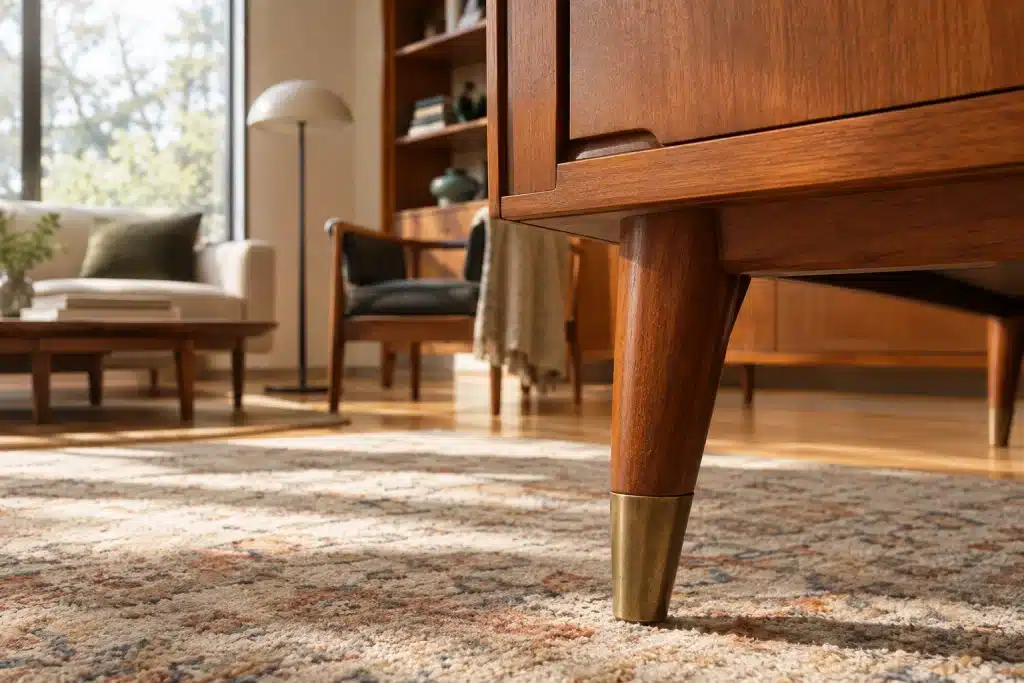
Applying a clear spray lacquer creates a permanent film barrier, which can be useful in specific high-wear applications:
- High-Wear Exterior Components: Metal leg ferrules at the base of dining chairs, desks, or coffee tables undergo frequent contact with vacuum cleaners, shoes, and floor mops, making a hard lacquer barrier practical.
- Drawbacks on Vintage Hardware: Over time, spray lacquer can chip or crack around sharp edges. Moisture and atmospheric gases can seep beneath compromised lacquer, leading to dark, spiderweb-like oxidation lines that are difficult to spot-treat without chemically stripping the entire coating. For drawer pulls and handles, microcrystalline wax remains the safer, more controllable choice.
DIY Mistakes That Can Damage Vintage Brass
Popular internet restoration advice often suggests using common household acids for fast metal cleaning. While these hacks can make metal shiny quickly, they carry significant chemical risks for vintage alloys.
Acidic Cleaners and the Risk of Dezincification
Soaking tarnished brass hardware in acidic solutions like vinegar, lemon juice, or ketchup relies on acid to rapidly dissolve surface oxides. However, acidic cleaners alter brass surfaces, and prolonged or inappropriate acid exposure can contribute to dezincification in susceptible copper-zinc alloys.
During dezincification, the acid preferentially leaches zinc out of the alloy matrix, leaving behind a porous, copper-enriched surface layer. Instead of clean, yellow brass, the hardware turns a splotchy, dull pink or salmon color. A pinkish surface is often a sign of structural alloy alteration rather than simple tarnish; further treatment depends on the depth and extent of the dezincification, and severely affected plated hardware may require professional re-plating or replacement.
Abrasive Hazards: Wire Wheels and Harsh Polishes
Using high-speed rotary tools, wire wheels, or coarse metal polishes on mid-century hardware introduces several structural hazards:
- Eroding Cast Details: Power-driven metal brushes round off crisp edges, softening the clean geometric profiles characteristic of mid-century design.
- Surface Gouging: Steel or stiff brass wire bristles leave fine micro-scratches across soft brass alloys, dulling the metal’s natural reflective quality.
- Overheating Plated Surfaces: High-RPM buffing pads generate localized friction heat that can cause aged, fragile electroplating to blister and detach from the base metal.
Summary Checklist for MCM Brass Restoration
Maintaining vintage brass hardware requires minimal intervention focused on preservation:
- Perform Initial Screening: Combine magnetic tests, weight checks, and thread inspections to evaluate whether hardware is solid brass or plated metal.
- Prioritize Mild Cleaning Methods: Use warm water, mild dish soap, and soft nylon brushes to lift oils and dirt while preserving stable, natural patina.
- Spot-Treat Active Corrosion: Address powdery or crumbly green corrosion spots locally using cotton swabs and wooden toothpicks, leaving surrounding patina intact.
- Avoid Harsh Acids & Power Abrasives: Skip vinegar, ketchup, and wire wheels to prevent dezincification and permanent surface scratch patterns.
- Apply Reversible Protection: Finish with a thin, buffed layer of microcrystalline wax to guard against skin oils and environmental moisture.
References & Further Reading
For those interested in the scientific principles of metal conservation and artifact preservation, the following resources offer detailed technical guidance:
- Canadian Conservation Institute (CCI): CCI Notes 9/3 – The Cleaning, Polishing and Protective Waxing of Brass and Copper. Department of Canadian Heritage.
- Canadian Conservation Institute (CCI): CCI Notes 9/13 – Preventing and Treating the Dezincification of Brass. Department of Canadian Heritage.
- Smithsonian Museum Conservation Institute: Care and Cleaning of Iron, Copper, Brass, and Bronze Objects. Smithsonian Institution.



1 thought on “How to Clean Vintage MCM Brass Without Ruining the Patina”
Comments are closed.