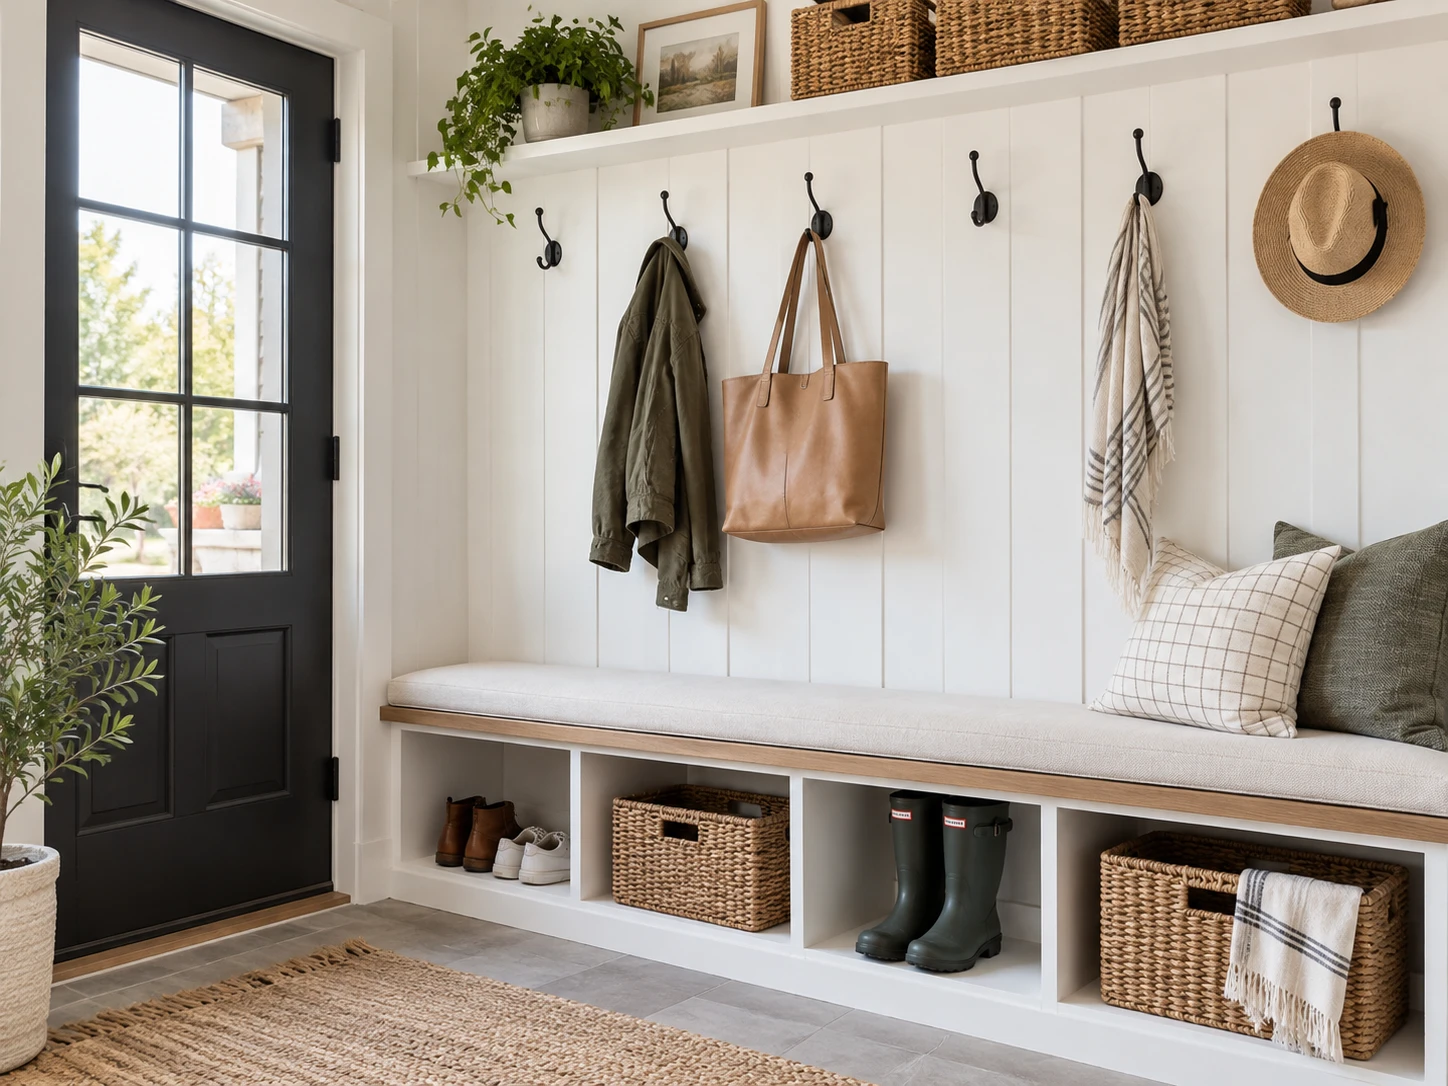
How high should you hang hooks in a mudroom? For most adults, a starting height of 60 to 65 inches above the finished floor works well. For children, 36 to 48 inches is a practical starting range, depending on their height and reach.
However, hook height isn’t the only measurement that matters. A thick bench cushion can reduce the space available for hanging coats, while hooks placed too close together can make backpacks and winter jackets difficult to access. Before drilling, check your bench height, measure your longest coat, and locate the wall studs. The guidelines below will help you plan a functional layout for your everyday gear.
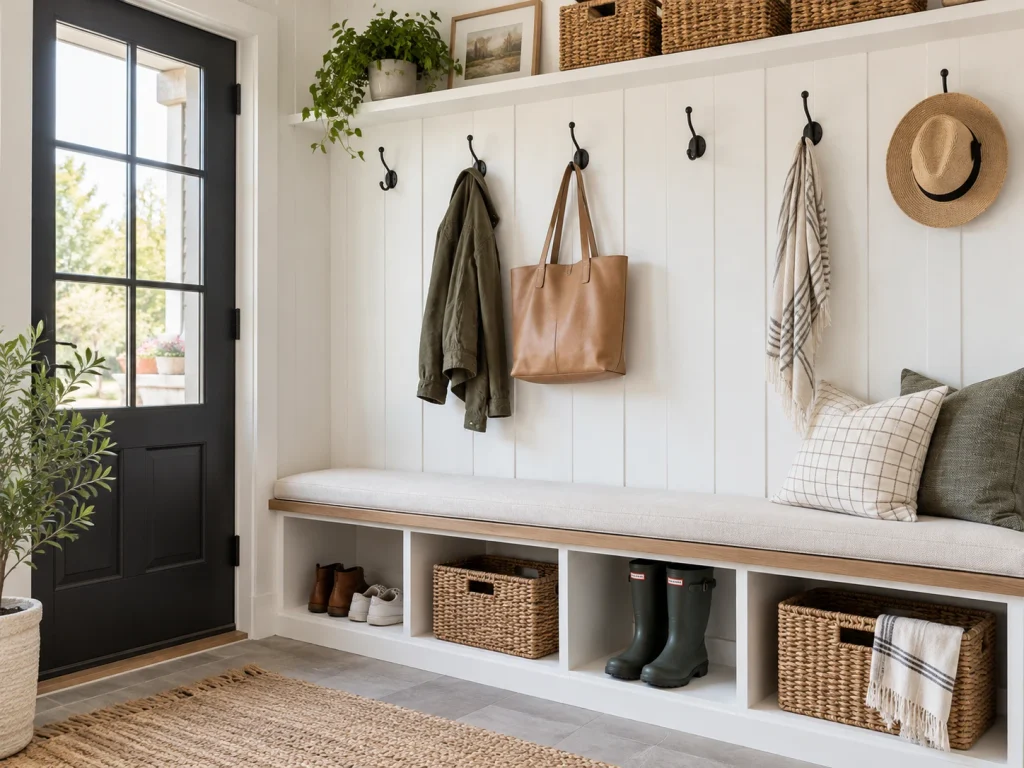
Quick Reference Measurement Chart
| Parameter | Suggested Starting Range | Notes & Adjustments |
| Adult Hook Height | 60″ – 65″ from finished floor | Measure from floor, not top of baseboard trim |
| Kids Hook Height | 36″ – 48″ from finished floor | Use as a starting point; prioritize the child’s actual reach |
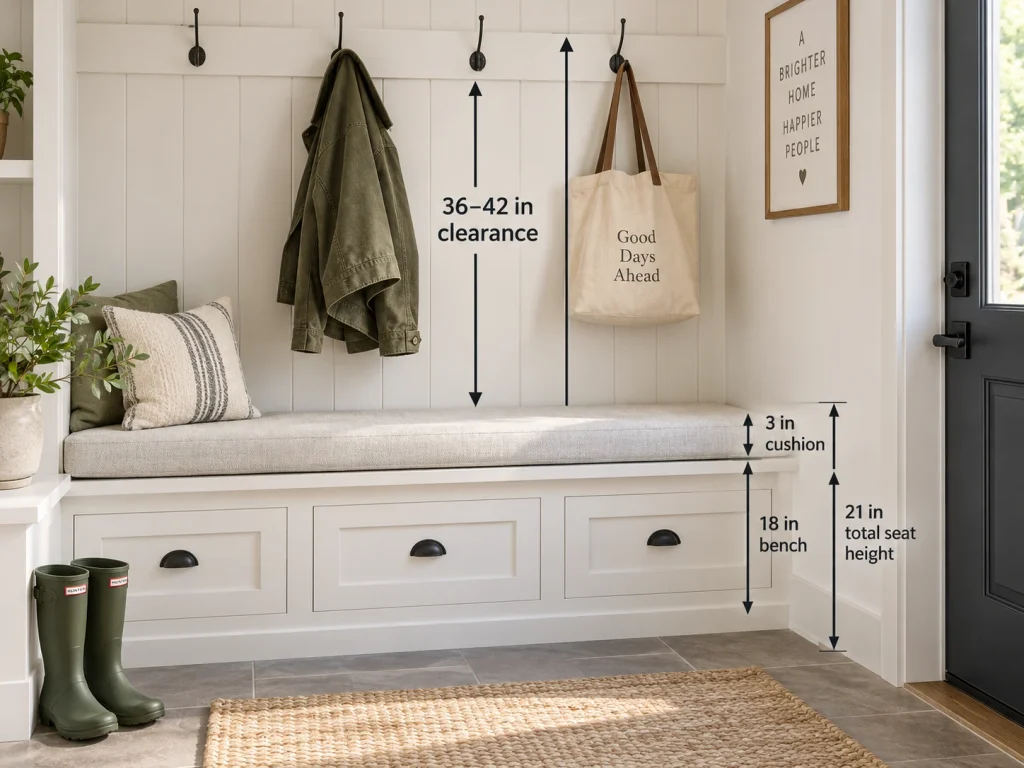
| Clearance Above Bench | 36″ – 42″ above seat/cushion | Adjust based on your household’s longest outerwear |
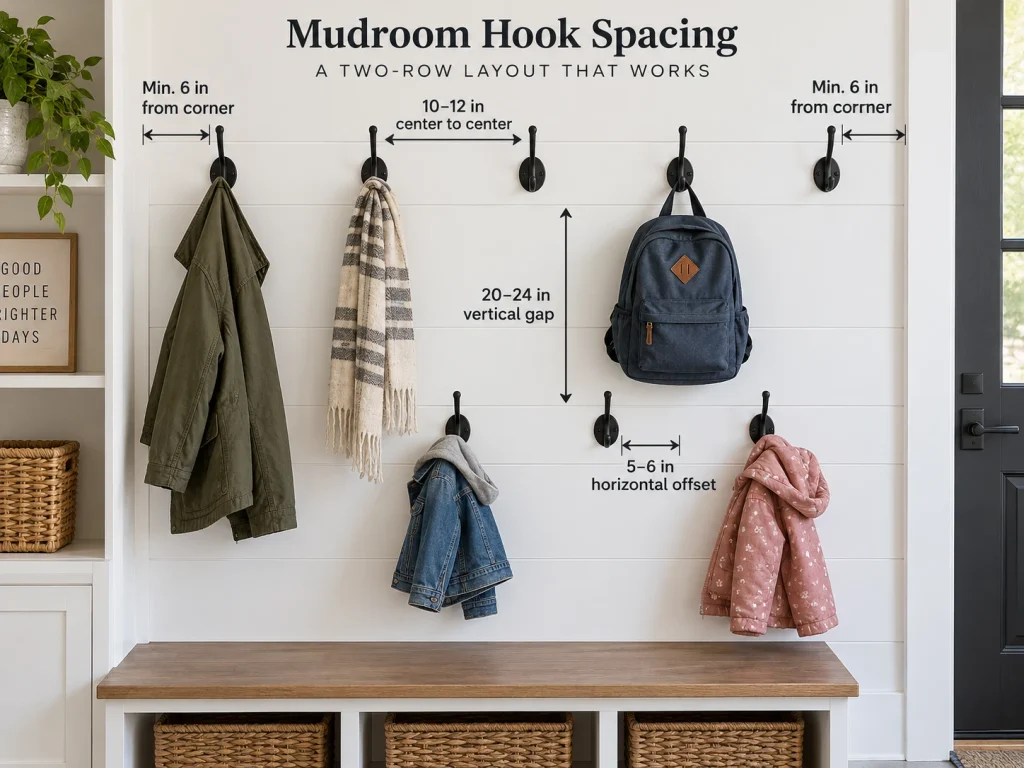
| Horizontal Hook Spacing | 10″ – 12″ center-to-center | Reduce to 8″–9″ for light jackets/keys only |
| Two-Row Vertical Distance | 20″ – 24″ gap between hooks | Actual gap varies based on selected upper/lower heights |
| Wall Corner Buffer | Min. 6″ from inside corners | Prevents coat friction against adjacent walls |
Note: The dimensions provided in this guide are recommended starting ranges based on common residential design practices. They do not represent building codes. Always verify specific weight ratings and mounting instructions provided by your hook and anchor manufacturers.
Suggested Coat Hook Height (Adults & Kids)
When planning hook heights on an open wall, always measure starting from the finished floor (tile, hardwood, or LVP) rather than the top of decorative baseboards.
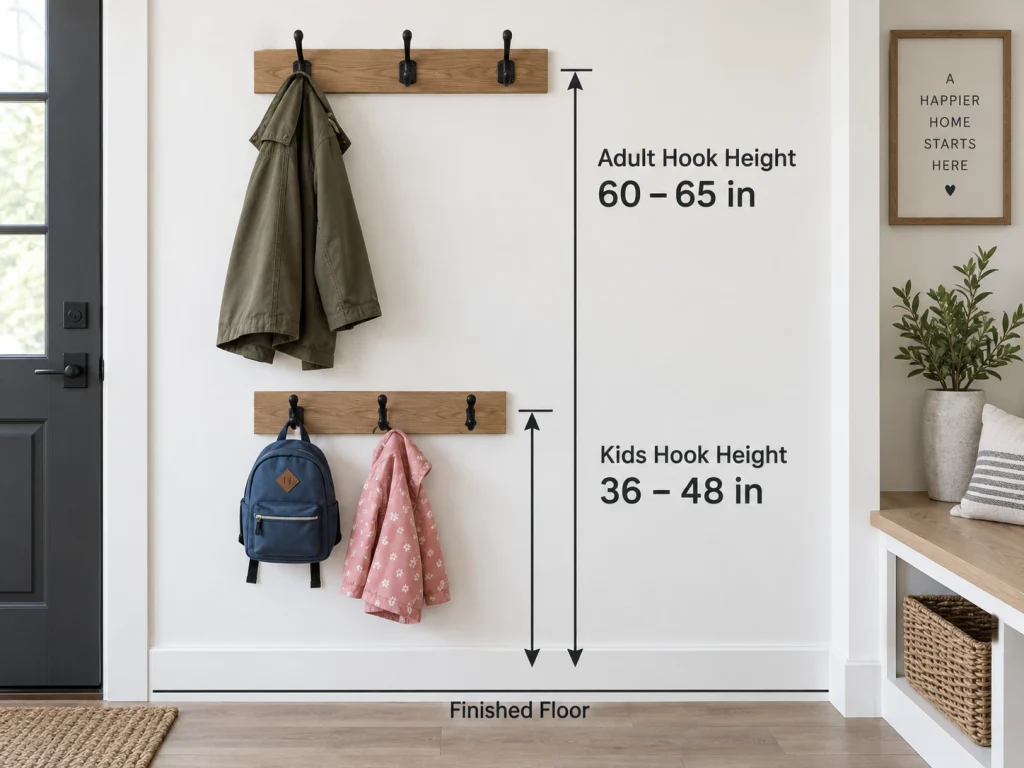
- Suggested Adult Hook Height (60″ to 65″): A height of 60 inches serves as a reliable starting baseline, allowing most adults to reach items comfortably. If household members are tall, or if you frequently store longer garments, mounting at 64 to 65 inches provides cleaner clearance.
- Kids Hook Height (36″ to 48″):
- Ages 3–6: 36 to 40 inches (typical starting range).
- Ages 7–12: 42 to 48 inches (typical starting range).
- Important: Age-based ranges are strictly reference points. Prioritize your child’s actual overhead reach over fixed numbers. Have your child stand comfortably at the wall and mark a height where they can easily loop a heavy bag or jacket without strain or tipping on their toes.
Determining Hook Height Based on Bench Clearance
When installing hooks above a built-in bench, the vertical clearance between the bench surface and the hook becomes the primary measurement.
Accounting for Bench Height and Cushions
A standard wooden bench frame sits 18 inches off the floor. However, if you add a 2- to 3-inch upholstered cushion, your actual sitting surface height becomes 20 to 21 inches.
To maintain a comfortable 36 to 42 inches of hanging clearance above the sitting surface:
- Without a cushion: Adding 36–42 inches to an 18-inch wood bench puts your hooks at 54 to 60 inches above the floor.
- With a 3-inch cushion: Adding 36–42 inches to a 21-inch total bench height puts your hooks at 57 to 63 inches above the floor.
Checking Outerwear and Backpack Fits
- Clearance Flexibility: The 36 to 42-inch range is a practical starting guideline rather than a fixed limit. Depending on style, full-length winter dusters, long trench coats, or heavy ski parkas can vary significantly in length. Rather than relying on standard averages, always measure your household’s actual longest outerwear from the collar loop down to ensure the hem will not crumple against the bench or cushion.
- Backpacks and Totes: Backpack sizes and loop handle positions vary widely. Hang your actual backpacks by their top loops during planning to confirm that the bottom of the bag hangs completely suspended above the bench or floor.
Example: Hook Height Above a Cushioned Bench
A mudroom bench has an 18-inch wooden seat and a 3-inch cushion. The finished seating surface is 21 inches above the floor.
For 39 inches of hanging clearance:
A hook placed 60 inches above the floor provides 39 inches of clearance from the cushion surface to the hook. Always check the length of your coats and confirm whether everyone in the household can comfortably reach the hook before securing it permanently.
Interactive Mudroom Hook Layout Calculator
Horizontal Spacing Between Mudroom Hooks
Proper horizontal spacing keeps coats from overlapping tightly, which helps damp outerwear dry faster and prevents items from being knocked off the wall.
- Standard Spacing: Space hooks 10 to 12 inches apart (measured center-to-center).
- Narrow Nooks or Light Use: An 8 to 9-inch spacing works for small entryways used mainly for light jackets, hats, and keys.
- Bulky Outerwear & Bags: For heavy winter coats, backpacks, or multi-pronged double hooks, 10 to 12 inches gives each item sufficient breathing room.
- Corner Clearance: Leave at least 6 inches between the outermost hooks and any inside wall corner or adjacent cabinetry. This prevents bulky coats from rubbing against adjacent painted surfaces.
Two-Row Hook Setups for Family Entryways
If horizontal wall space is limited, installing hooks in two horizontal rows expands your storage capacity.
Staggered Layout and Vertical Distance
Aim for a vertical gap of roughly 20 to 24 inches where practical. The actual gap may be larger depending on the selected adult and child hook heights:
- Upper Row: Set between 60 to 65 inches from the floor for adult coats.
- Lower Row: Set between 36 to 40 inches from the floor for children’s gear or bags.
To keep coats on the upper row from covering the lower hooks:
- Use a Horizontal Offset: Position each lower hook halfway between two upper hooks. For upper hooks spaced 10 to 12 inches apart, this creates a 5- to 6-inch horizontal offset (a zig-zag pattern).
- Note on Long Garments: Even with a 24-inch gap, full-length winter coats on upper hooks may still drape over lower hooks. Reserve the upper row above lower hooks for shorter jackets or bags, or move long coats to dedicated single-row hooks.
Mounting Mudroom Hooks Securely
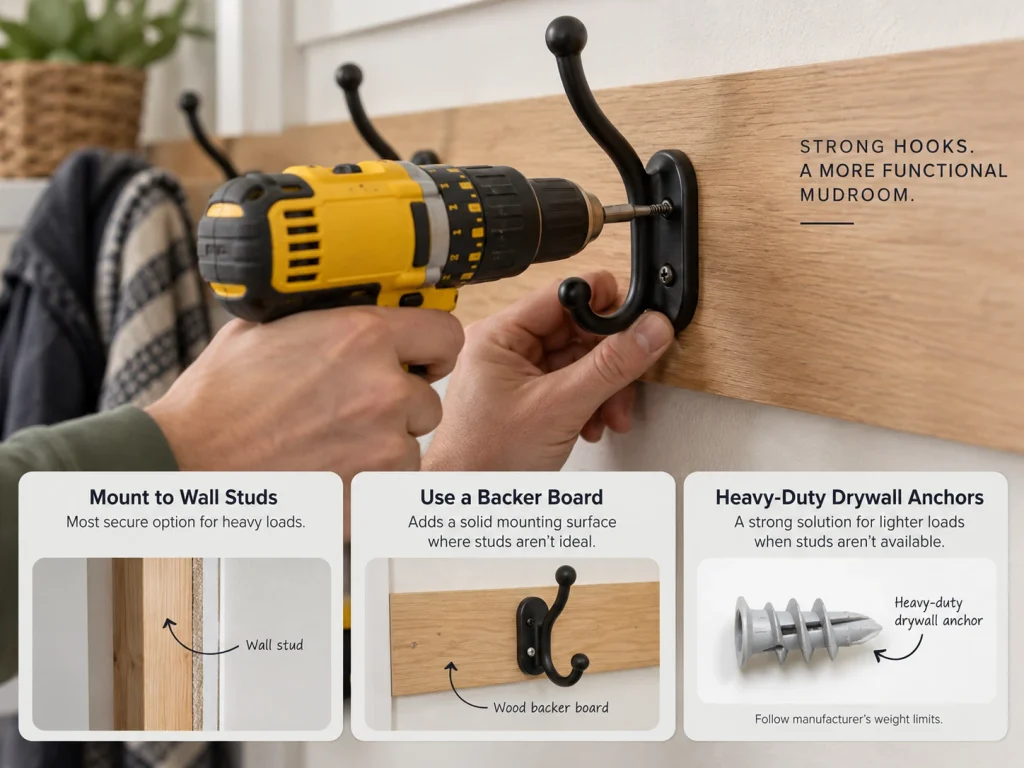
Coat hooks must withstand dynamic downward pulls from heavy winter gear and backpacks. Secure mounting prevents wall damage over time.
Method 1: Mounting to Wall Studs
In standard American home framing, wall studs are spaced 16 inches or 24 inches apart on-center. Locating wood studs with a stud finder and driving screws directly into solid wood provides the most reliable connection. Always check the weight rating provided by the hook manufacturer for specific load guidelines.
Method 2: Mounting a Wood Backer Board
Because wall studs are fixed at 16-inch or 24-inch intervals, relying solely on stud locations can make symmetrical hook placement difficult.
- Secure a 1×4 or 1×6 wood board horizontally across the wall, anchoring it into at least two studs using appropriate wood screws.
- Mount your decorative hooks onto the backer board at your preferred spacing (e.g., every 10 or 12 inches).
- Pre-drilling: Drill small pilot holes into the wood board before driving in decorative hook screws to prevent the wood from splitting or screw heads from snapping under pressure.
Method 3: Mounting to Drywall
When a hook must be placed where no stud is present:
- Avoid basic plastic expansion plugs, as repeated downward pulling can loosen them in sheetrock.
- Use heavy-duty anchors such as spring toggle bolts or self-drilling metal wall anchors.
- Safety Note on Dynamic Loads: When hanging heavy backpacks or loaded tote bags, do not rely solely on the rated weight limit stamped on an anchor package. Overall holding capacity depends on the combination of anchor rating, drywall thickness (1/2″ vs. 5/8″), wall condition, and the physical hook base size. Check both the hook manufacturer’s guidelines and the anchor specs before loading heavy gear.
Practical Tip: Mock Up Before Drilling
Instead of guessing, mark your proposed hook locations on the wall using low-tack painter’s tape or paper cutout templates. Hold your longest coat or loaded backpack against the marked spots to check for proper clearance above the floor or bench. Sit on the bench to verify that hung items won’t interfere with seating before making permanent screw holes.
Pre-Installation Checklist
Before grabbing your drill, review this quick checklist to avoid costly mistakes and unnecessary drywall repairs:
Your checklist is saved in this browser. PDF and PNG exports include your items and checked status. These are planning reminders, not structural engineering or manufacturer installation instructions.
Complete Mudroom Dimensions & Layout Planning
Hook height is one part of a balanced entryway layout. For optimal flow, coordinate your hook placement with bench depth, cubby sizing, and surrounding doorway clearances.
Planning a Complete Renovation?
If you are designing full custom cabinetry, hall trees, or built-in storage units, review our detailed Custom Mudroom Design Guide for layout specifications, standard cabinet dimensions, and storage planning tips!