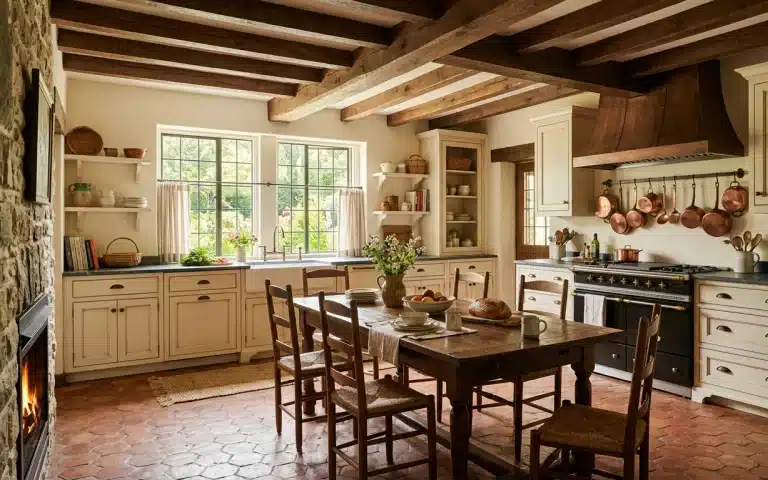
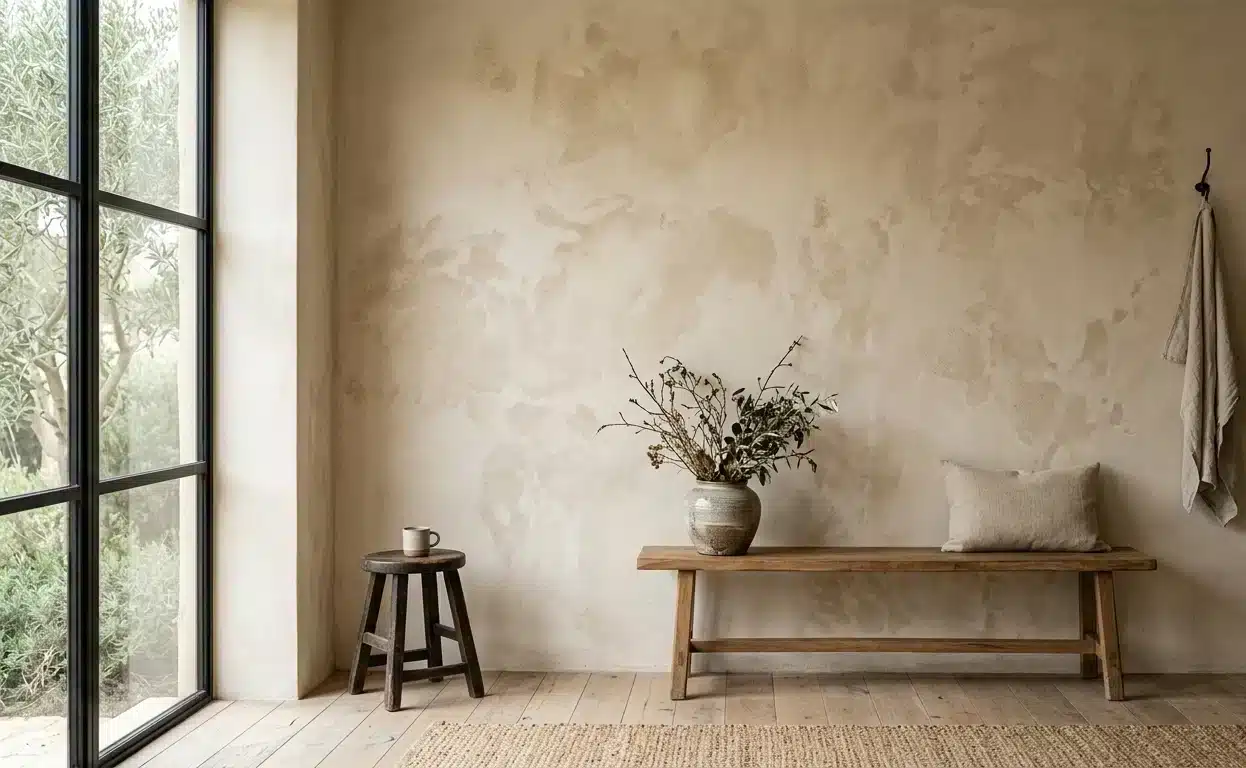
Limewash paint is a natural, mineral based wall finish made from slaked lime and water that cures through carbonation rather than forming a synthetic plastic film. It creates a soft, mottled finish that gives limewashed walls a distinctive mineral character while remaining highly vapor permeable, making it especially well suited to porous mineral surfaces such as plaster, brick, and masonry.
At a Glance: Is Limewash Right for Your Project?
- Best For: Organic texture, matte depth, porous mineral surfaces, and interior or exterior walls where vapor permeability is desirable.
- Not Ideal For: Shower interiors, high abrasion areas, or surfaces requiring frequent aggressive chemical cleaning.
- Best Substrates: Raw plaster, brick, stone, masonry, and properly prepared drywall.
- Water Resistance: Not waterproof when unsealed.
What Is Limewash Paint?

Traditional limewash is an inorganic mineral finish composed of slaked lime calcium hydroxide, Ca(OH)₂ mixed with water and natural mineral pigments. Unlike modern latex or acrylic paints that form a polymer based film on the surface, limewash reacts with carbon dioxide as it cures and can bond well to suitably porous mineral substrates.
The Science Behind the Finish: The Lime Cycle
Limewash is created through a natural chemical process known as the lime cycle [3]:
- Calcination: Raw limestone (CaCO₃) is heated at high temperatures in kilns to drive off carbon dioxide, producing quicklime (CaO).
- Slaking: Quicklime is combined with water in a controlled process to yield calcium hydroxide (Ca(OH)₂), a caustic lime putty [1].
- Carbonation: When applied to a wall, water evaporates and the slaked lime absorbs atmospheric carbon dioxide (CO₂), converting back into solid calcium carbonate (CaCO₃):
Ca(OH)₂ + CO₂ → CaCO₃ + H₂O
This carbonation process converts calcium hydroxide back into calcium carbonate, allowing the limewash to form a durable mineral finish on suitably porous substrates.
What Does Limewash Paint Look Like?
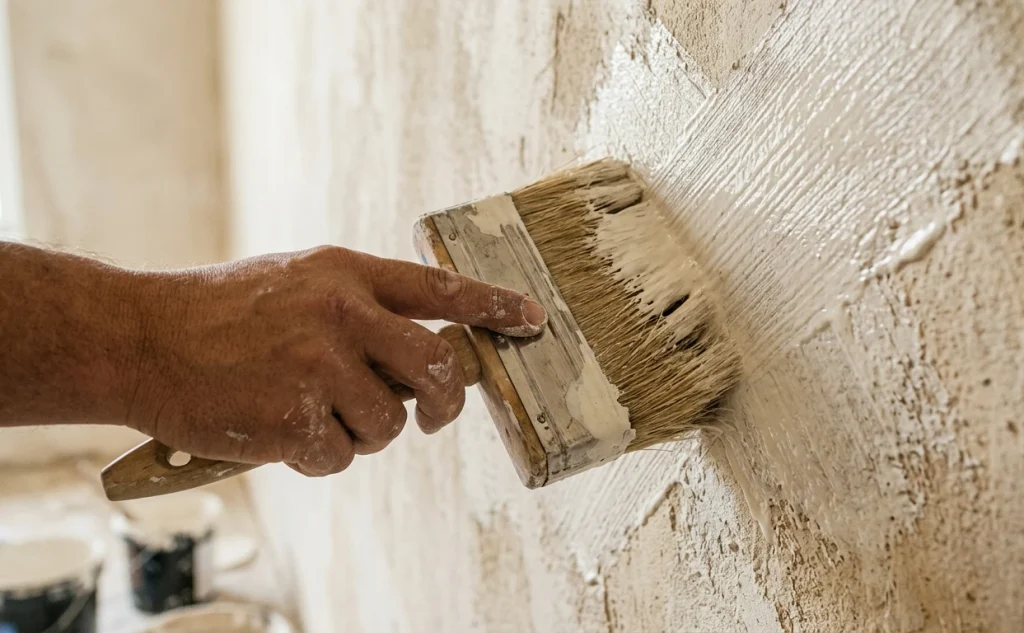
Limewash is recognized by its soft matte finish, mineral depth, and subtle cloud like shading across the surface, commonly known as mottling.
Matte Depth and Light Scattering
Conventional paints rely on synthetic binders that create a relatively flat, uniform surface plane. The mineral structure of cured limewash scatters ambient light softly across the wall, producing a velvety, non reflective finish that shifts in tone as natural lighting changes throughout the day.
Shading and Mottling
Mottling occurs naturally during application. Minor variations in brush stroke density, coat thickness, and substrate porosity cause subtle shifts in how pigments settle and dry.
Pro Tip: Limewash dries considerably lighter than it appears when wet in the container. Always apply a multi coat test patch on a sample board and allow it to dry completely before finalizing a color, as different limewash color palettes cure with varying levels of subtle depth.
What Are the Benefits and Drawbacks of Limewash?
Benefits
- Vapor Permeability: Traditional limewash is generally highly vapor permeable, allowing water vapor to pass through the finish more readily than many film forming coatings [2]. However, actual vapor permeance depends on the formulation, number of coats, substrate, and any protective sealer used.
- Natural Mold & Mildew Resistance: Fresh, traditional limewash is strongly alkaline. This high pH environment can inhibit the growth of many microorganisms while the coating remains sufficiently alkaline. However, limewash is not a substitute for moisture control or proper mold remediation.
- Low VOC Potential: Pure, traditional limewash contains no petroleum solvents or synthetic binders, yielding a near zero VOC profile (exact levels depend on added pigments or sealers).
- Graceful Aging: Unlike film forming coatings that may peel or blister over time, cured limewash ages as a mineral layer that develops a soft patina.
Drawbacks
- Substrate Sensitivity: Will not adhere directly to modern smooth drywall or glossy latex paint without specialized bonding primers.
- Labor Intensive Application: Achieving the characteristic mottled finish requires manual crosshatch brushing rather than fast rolling.
- Liquid Absorption: Unsealed limewash absorbs moisture and oils, which can temporarily darken the surface or cause permanent staining if unaddressed.
- Chalking Risk: If applied over an overly dry surface or in direct sunlight, incomplete carbonation can cause dusting and result in limewash rubbing off or chalking.
Where Can You Use Limewash Paint?
Limewash is versatile across residential and commercial interiors as well as exterior masonry when paired with proper surface prep.
- Living Rooms, Bedrooms & Hallways: Excellent for interior walls where rich texture and soft matte depth are desired.
- Brick, Stone & Raw Plaster: Ideal for porous mineral surfaces, where limewash can bond well to the substrate while maintaining high vapor permeability compared with many film forming coatings.
- Kitchens & Bathrooms: Suitable for bathroom ceilings and walls to manage ambient humidity, provided splash zones near sinks or tubs are protected with a breathable mineral sealer.
- Modern Drywall: Can be successfully limewashed when properly prepared with a compatible primer or base coat system recommended by the manufacturer.
Limewash vs. Conventional Paint

| Feature | Limewash Paint | Latex / Acrylic Paint |
| Base Material | Slaked lime (Ca(OH)₂) & mineral pigments | Synthetic acrylic/vinyl polymers |
| Curing Mechanism | Carbonation (Absorbs CO₂) | Water evaporation & polymer film formation |
| Visual Finish | Soft matte, mottled texture | Uniform, flat to glossy sheen |
| Vapor Permeability | Highly vapor permeable | Varies by formulation |
| Alkalinity / Mold Defense | Initially highly alkaline | Varies by formulation |
| Application Method | Wide masonry brush (Crosshatch) | Roller, brush, or airless sprayer |
| Best Substrates | Plaster, brick, masonry, primed drywall | Drywall, wood, previously painted surfaces |
| Touch Ups & Repairs | Blends into existing mineral layers | Touch up spots are often visible |
Can You Apply Limewash to Drywall?
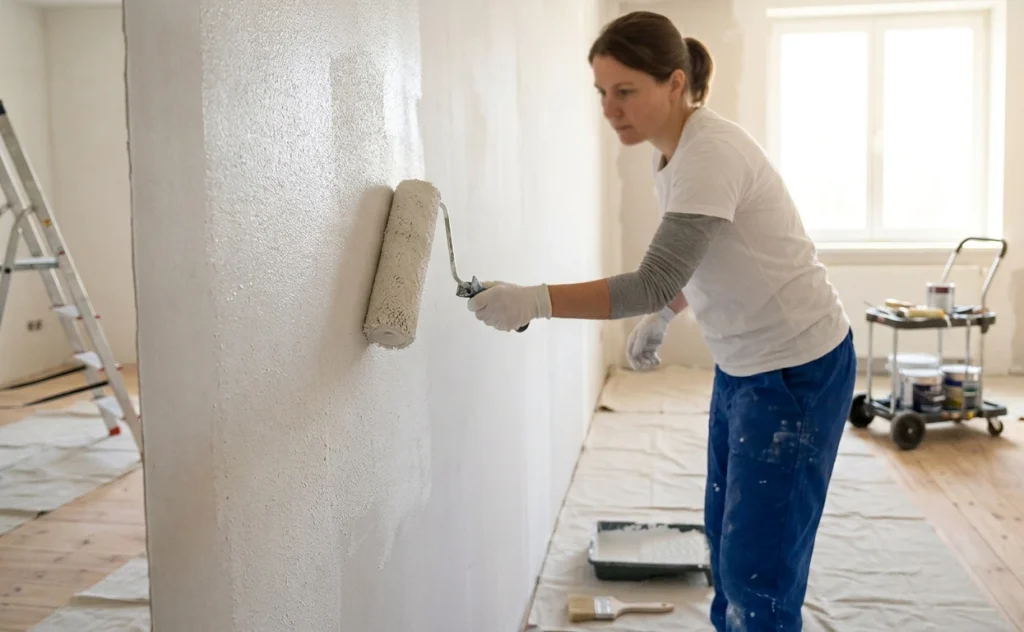
Yes, you can apply limewash to drywall, but you cannot apply it directly to standard unprimed drywall.
Standard drywall consists of paper facing and taped joints treated with joint compound. These two materials absorb moisture at dramatically different rates. Applying limewash directly can result in patchy, uneven absorption and visible joint lines because drywall does not provide the same porous mineral surface as raw plaster, masonry, or brick.
To prepare drywall for limewash:
- Sand all joint compound smooth and remove all surface dust.
- Apply a specialized mineral or quartz based primer recommended by the manufacturer. This creates uniform surface absorption and provides the necessary mechanical grip when limewashing drywall.
How to Apply Limewash Paint
Applying limewash requires a brush applied technique to encourage subtle tonal variation and proper bonding.
-
1
Surface Prep & Primer
-
2
Lightly Dampen
-
3
Crosshatch Brushing
-
4
Apply 2–3 Thin Coats
Step 1: Surface Prep and Priming
Clean the substrate thoroughly. When working over existing latex or acrylic finishes, sand lightly to break the gloss and apply a compatible mineral bonding primer a critical requirement for successfully applying limewash over latex paint.
Step 2: Dampen the Surface (If Recommended)
On highly absorbent masonry or porous mineral primers, mist the wall lightly with clean water prior to painting. This prevents the wall from pulling moisture out of the limewash too rapidly, allowing full carbonation to take place.
Step 3: The Crisscross Brush Method
Use a wide, natural bristle block or masonry brush:
- The “X” Motion: Sweep the brush in broad, overlapping crosshatch strokes forming “X” patterns rather than straight vertical or horizontal lines.
- Maintain a Wet Edge: Work continuously from one side of the wall to the other. Stopping mid wall creates a visible lap mark where wet and dry lime overlap.
Step 4: Layering and Curing
Apply 2 to 3 thin coats rather than one thick layer. Allow each coat to dry and begin curing according to the manufacturer’s instructions, typically waiting around 12–24 hours, depending on the product and environmental conditions, before applying the next coat. Multiple thin coats facilitate air access for even carbonation and richer color depth.
Is Limewash Waterproof?
Unsealed limewash is water tolerant and vapor permeable, but it is not waterproof.
When exposed to liquid water, unsealed limewash absorbs moisture and temporarily darkens. Once the water evaporates, it dries back to its original tone under normal circumstances. However, continuous direct water contact such as inside a shower enclosure will erode the lime finish over time.
High Moisture Zone Protection
- Breathable Mineral Sealers: Silane/siloxane or matte protective sealers recommended by the manufacturer help repel liquid water while maintaining low surface sheen and breathability.
- Shower Interiors: For shower interiors and other areas exposed to continuous direct water, consider a purpose designed waterproofing system or a dedicated water resistant plaster finish after evaluating limewash vs. Tadelakt vs. Venetian plaster for wet zone performance.
How to Clean and Maintain Limewashed Walls
Proper care helps limewashed walls maintain their matte texture and natural variation over time.
Unsealed Surfaces
- Dusting: Remove dust periodically using a soft, dry microfiber cloth or a vacuum brush attachment.
- Cleaning: Avoid scrubbing unsealed limewash with wet sponges or harsh chemical detergents, as friction and soap additives can wear down the mineral layer.
Touch Ups and Repair
Limewash is forgiving when repairing scratches or scuffs:
- Mist the damaged section lightly with clean water.
- Dilute a small portion of your original limewash color.
- Feather the wash into the scuff using the same crosshatch brush technique, allowing the fresh lime to carbonate directly into the surrounding matrix as part of routine care for cleaning and maintaining limewash walls.
How Long Does Limewash Last?
Because limewash forms a mineral bond with suitable substrates rather than a conventional polymer film, it is less prone to peeling and blistering caused by film failure. However, improperly prepared surfaces, structural movement, or prolonged moisture exposure can still cause deterioration. With proper surface preparation and indoor conditions, interior limewash can remain attractive for decades. Exterior limewash may require periodic refresher coats depending on climate, exposure, and substrate conditions.
Frequently Asked Questions
Can You Apply Limewash Over Latex Paint?
Yes, you can apply limewash over latex paint, but not directly. The existing paint must be cleaned, lightly sanded to break the gloss, and coated with a compatible mineral bonding primer before limewash application.
Why Is My Limewash Rubbing Off or Dusting?
Limewash rubs off when it dries too quickly before carbonation finishes. This typically happens when applied over unprimed drywall, in low humidity, or under direct heat. Lightly dampening the wall before application slows evaporation, helping to cure the finish and prevent limewash dusting or rubbing off.
How Many Coats of Limewash Do You Need?
Most projects require 2 to 3 thin coats. The exact number depends on the product, substrate, color, and desired opacity, so always follow the manufacturer’s application instructions. Applying multiple thin coats helps support more even carbonation through the coating and produces greater pigment depth and mottling.
Can Limewash Be Used in a Bathroom?
Yes, limewash works well on bathroom walls and ceilings outside direct splash areas. Its high vapor permeability allows water vapor to pass through the finish, while its natural alkalinity can inhibit the growth of many microorganisms. Protect splash areas around sinks with a breathable sealer.
How Do You Repair Damaged Limewash Walls?
Dampen the damaged area with water, then feather in a thin coat of diluted original limewash using a crisscross brush stroke. The new coat will carbonate directly into the existing mineral layer.
References & Technical Standards
- ASTM International — ASTM C1489: Standard Specification for Lime Putty for Structural Purposes (Withdrawn 2022). (Provides historical material specifications for slaked lime putty used in traditional lime mortars, plasters, and mineral washes).
- Building Science Corporation — Lstiburek, J. (2006, rev. 2011): Understanding Vapor Barriers (BSD-106). (Technical guidance on general moisture transport, vapor movement, and wall assembly permeability principles).
- Ashurst, J. and Ashurst, N. (1988): Practical Building Conservation: English Heritage Technical Handbook, Vol. 3 — Mortars, Plasters and Renders. Gower Technical Press. (Technical reference detailing calcination, slaking mechanisms, and atmospheric carbonation chemistry).