
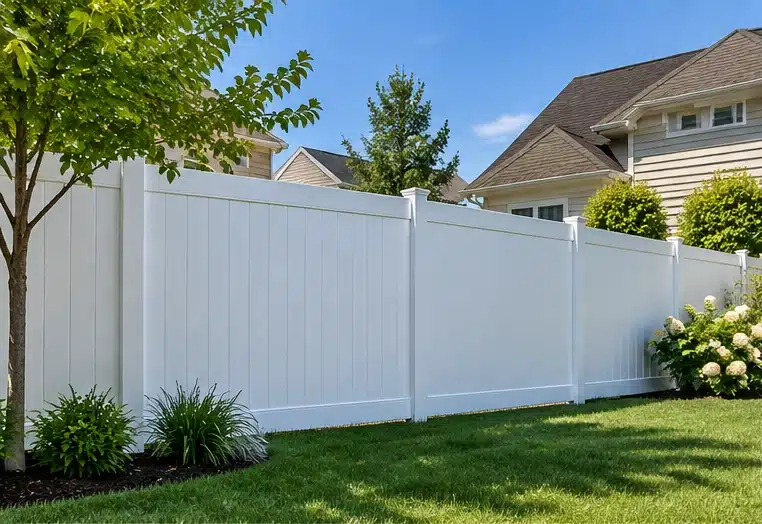
Installing a 6-foot vinyl privacy fence can give your backyard more privacy while keeping pets and children securely enclosed. It also eliminates the regular scraping, painting, and staining that traditional wooden fences require over time.
Ordering and installing fence panels requires careful preparation. Before placing an order, check the manufacturer’s specification sheet. You need to verify exact post spacing, site slope, local wind conditions, and frost-line digging depths. Ordering based solely on nominal panel labels is one of the most common reasons homeowners end up with misaligned posts.
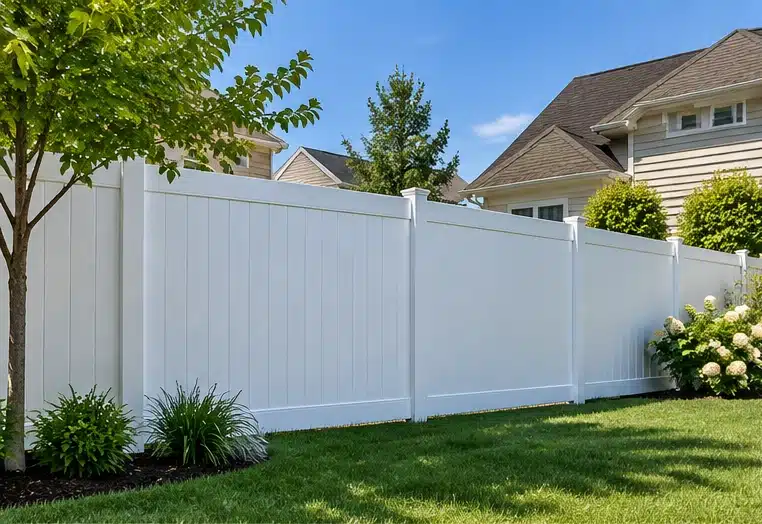
What Are Plastic Privacy Fence Panels? (Vinyl vs. PVC Explained)
When browsing fencing options, terms like plastic, vinyl, PVC, and resin are often used interchangeably. Understanding the material composition prevents ordering incompatible components.
Understanding Vinyl, PVC, and Other Plastics
- Vinyl / PVC Privacy Panels: In the North American fencing industry, “Vinyl” and “PVC” (Polyvinyl Chloride) refer to the same rigid thermoplastic material. Commercial vinyl privacy panels include UV stabilizers to delay yellowing and surface chalking from prolonged sun exposure.
- Polypropylene & Resin Screens: These are lightweight, flexible plastics typically sold as decorative lattice sheets or garden borders. They lack the structural strength required for full-height perimeter privacy fences.
- Wood-Plastic Composite (WPC): A dense blend of wood fibers and recycled plastic. Composite offers a natural wood texture and rot resistance, but carries higher material weight and upfront cost than standard vinyl panels.
Full Privacy vs. Semi-Privacy Panels
- Full Privacy Panels: Feature interlocking tongue-and-groove boards set flush within horizontal rails, blocking unwanted views from neighboring properties.
- Semi-Privacy Panels: Incorporate small gaps between pickets or combine a solid lower section with a decorative lattice top. These designs allow air to flow through, reducing wind load on the fence posts.
The Real Pros and Cons of Going Plastic
While low maintenance is the main selling point of vinyl fencing, local climate and site conditions create distinct trade-offs.
Advantages
- No Regular Painting or Staining: Solid-color vinyl panels eliminate the recurring material and labor costs of sealing wood every few years.
- Rot and Insect Resistance: Rigid PVC does not absorb ground moisture, making it immune to fungal decay, wet rot, and subterranean termites.
- Simple Cleaning: Surface pollen, dust, and light soil rinse off easily with a garden hose and mild soap.
Considerations
- Higher Upfront Investment: Material costs per section are higher than standard pressure-treated pine.
- Thermal Expansion: PVC expands in summer heat and contracts in cold weather. Fastening pickets or rails too tightly without required channel clearances causes panels to warp or buckle over time.
- Impact Sensitivity in Extreme Cold: In sub-zero temperatures, lower-grade PVC loses impact resistance, making panels vulnerable to cracking upon heavy impact.
Popular Fence Styles to Match Your Home
Most homeowners choose classic solid white vinyl panels for complete privacy, but manufacturers offer several architectural variations:
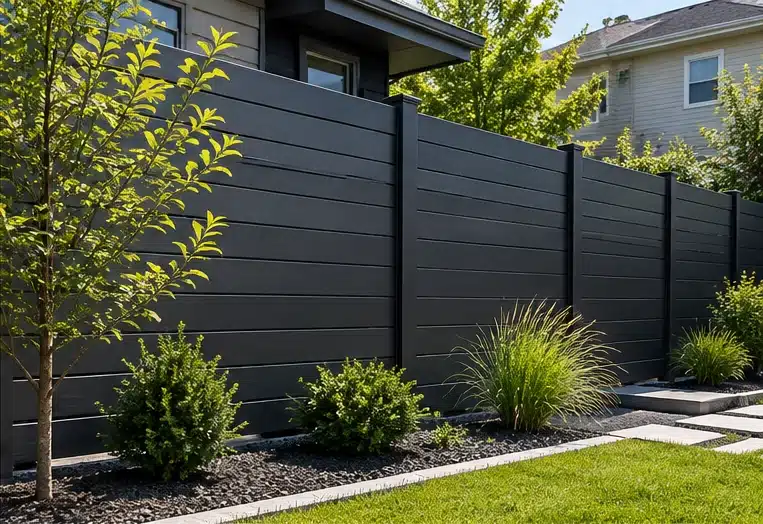
- Horizontal Slats: Features horizontal tongue-and-groove boards set within dark aluminum or vinyl frames for modern home designs.
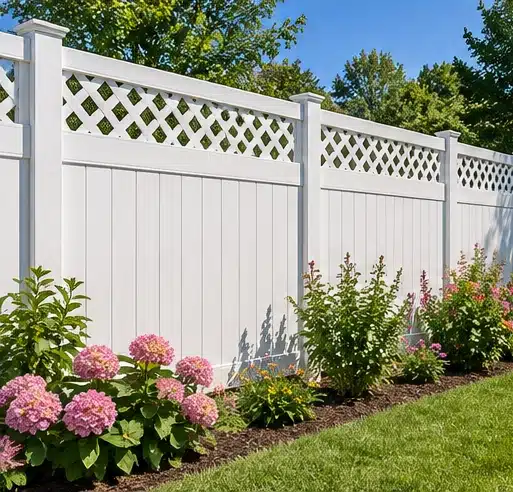
- Lattice-Top Panels: Pairs a 5-foot solid privacy base with a 1-foot decorative grid, letting light into the yard while maintaining lower-level privacy.
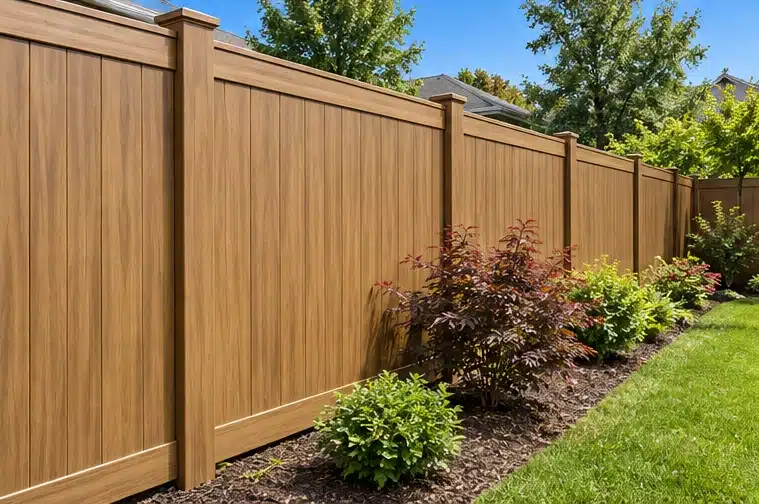
- Textured Faux-Wood Vinyl: Formulated with multi-tone colors and surface textures that mimic cedar or cypress without the splitting or warping of real wood.
- Planning Tip: If your goal is simply to conceal trash bins or block the view of an outdoor AC unit, a freestanding modular patio privacy screen may be a more practical solution than installing full post-embedded boundary fencing.
For privacy from neighboring upstairs windows, however, a fence or freestanding screen may not be enough. Strategically placed trees and shrubs can help block those higher sightlines without extending the fence.
Sizes, Dimensions, and Layout Planning
Before marking post holes for an 8-foot panel, check the manufacturer’s specification sheet. The nominal panel width, actual panel dimensions, and required post spacing are not always identical.
Nominal vs. Actual Dimensions: A Real Example
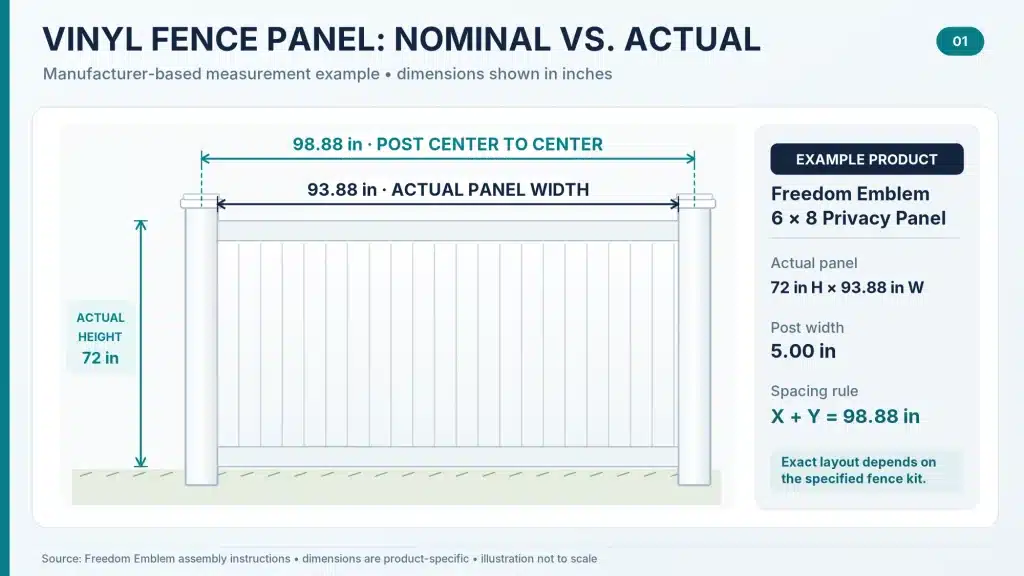
When a product label reads “6′ x 8′ Panel”, the 8-foot width is nominal.
For example, the Freedom Emblem 6×8 Privacy Panel measures 72 inches high by 93.88 inches wide. Its installation manual instructs installers to determine post center-to-center spacing by adding the panel width to the post width. With the specified 5-inch posts, this gives approximately 98.88 inches (8.24 feet) for an uncut panel section. Always follow the spacing instructions for your exact fence system.
Digging post holes at arbitrary 8-foot (96-inch) intervals without factoring in the actual panel width and specified post calculation method will result in incorrectly set posts.
VINYL FENCE PROJECT PLANNER
Fence Panel & Post Calculator
Plan each straight run, place your gates, and count shared posts once. Start with the spacing in your exact product manual—not the nominal panel label.
Feet & inches · Planning quantities onlyYour planning estimate
Run-by-run spacing plan
Every dimension below is post center-to-center. Do not cut a panel or rail to these numbers.
Gate-adjacent posts are a separate, non-overlapping count, including any that also sit at a corner or end. Ask your supplier for the correct routing, gate hardware, and reinforcement.
Automatic copy is unavailable. Select and copy this text:
Realistic Budgeting: What Does a Plastic Privacy Fence Cost?
Project expenses depend on regional labor rates, height, terrain slope, and material grade. According to national market averages from platforms like HomeGuide’s Vinyl Fence Cost Guide, standard 6-foot residential vinyl privacy projects average between $40 and $60 per linear foot installed, with premium finishes or difficult site conditions climbing higher.
The table below separates specific itemized component estimates from overarching national market benchmarks to avoid confusion between calculated sums and broad contractor quotes.
Cost Breakdown Estimates (Per Linear Foot)
Vinyl Privacy Fence Cost: DIY vs. Professional
Compare illustrative per-linear-foot component budgets with the broader installed market reference. The two figures use different data assumptions.
| Cost category | DIY planning estimate | Contractor itemized estimate |
|---|---|---|
| Panels, posts & caps | $20–$35 / linear ft | $20–$35 / linear ft |
| Concrete & hardware | $4–$8 / linear ft | $4–$8 / linear ft |
| Paid installation labor | $0 Your time is not priced | $16–$25 / linear ft |
| Calculated planning subtotal | $24–$43 / linear ft | $40–$68 / linear ft |
| Installed market referenceFor a typical 6-ft privacy fence | Not applicable | Approx. $40–$60+ / linear ftSeparate national benchmark, not the sum above |
Planning note: These figures are examples, not quotes. Surveying, permits, old-fence removal, gates, site conditions and local labor rates may add costs. Use the same assumptions when comparing contractor bids. The installed market reference is attributed in the article to HomeGuide; verify the current published range before posting.
Installed Market Reference (6-ft fence): Approximately $40–$60+ per linear foot for standard professional installation, based on the HomeGuide benchmark described above. This is a separate market reference, not the mathematical total of the independently estimated itemized ranges. The $24–$43/ft DIY figure is an estimated materials-and-hardware subtotal, not a turnkey installed price, and excludes the homeowner’s labor.
Note: Gates ($200–$500 each), property boundary surveys, building permits ($50–$200), and old fence removal and disposal ($10–$20/ft based on HomeGuide benchmarks for full removal/haul-away) will add to overall project budgets.
VINYL FENCE BUDGET PLANNER
DIY vs. Professional Fence Cost
Price your actual quantities, include the often-missed extras, and compare cash budgets. Use either an itemized pro estimate or an installed quote—never both.
USD · Editable example prices · Not a contractor quoteYour estimated project budget
This compares the inputs above, not market averages or guaranteed savings. Site difficulty, changes to scope, waste, structural upgrades and local quotes can change the total. A limited warranty is not a service-life estimate.
Automatic copy is unavailable. Select and copy this text:
Budget & Layout Planning Scenario: A 100-Foot Straight Line (No Gates)
For this example, 100 feet (1,200 inches) is the distance between the centers of the two end posts, not the distance between property-line markers or the outer faces of the posts. Use the exact dimensions and cutting rules for your chosen system before ordering materials.
With the Freedom Emblem example above, an uncut panel uses 98.88 inches of post center-to-center spacing (93.88-inch panel width + 5-inch post width). Twelve full sections would span 12 × 98.88 = 1,186.56 inches (98.88 ft), leaving only 13.44 inches between post centers at one end. That could produce an impractically short end section, depending on the manufacturer’s cutting limitations.
An illustrative symmetrical layout: Keep 11 full sections and use two shortened end sections, for 13 sections and 14 posts in a single straight run:
- 11 uncut sections: 11 × 98.88 = 1,087.68 inches between post centers in total.
- Remaining distance: 1,200 − 1,087.68 = 112.32 inches.
- Distance allotted to each shortened end section: 112.32 ÷ 2 = 56.16 inches post center-to-center.
- Using the same manufacturer’s spacing formula, the corresponding cut panel width would be approximately 51.16 inches (56.16 − 5). 56.16 inches is not the width to cut the panel.
This is a dimensional illustration, not an approved cutting plan. Before trimming, confirm that the particular panel and rail system can be shortened to that width without compromising the pickets, rail engagement, supports, or warranty. If 100 feet is the property boundary length rather than the distance between end-post centers, adjust the layout to account for post width, permitted setbacks, and site measurements.
Material Cost: Budgeting for 13 purchased panels, matching posts, concrete, and basic mounting hardware gives an illustrative DIY materials estimate of $2,400–$3,200. A standard 100-foot, 6-foot-high professionally installed fence at the market benchmark above would be approximately $4,000–$6,000, subject to local quotes and site conditions.
Vinyl vs. Wood vs. Composite: Material Comparison
Expected service life figures represent typical industry reference ranges under standard residential conditions and proper maintenance. Actual durability varies depending on climate exposure, wind loads, and manufacturing quality.
Vinyl vs. Wood vs. Composite: At a Glance
These are general trade-offs rather than guarantees. Local climate, installation quality, maintenance and product model affect performance.
| Decision factor | Vinyl (PVC) | Pressure-treated pine | Cedar | Wood-plastic composite |
|---|---|---|---|---|
| Upfront material cost | Moderate | Generally lower | Moderate, varies by grade | Generally higher |
| Routine maintenance | Wash as needed; no routine staining | Inspect, clean, refinish as needed | Inspect, clean, optional refinishing for appearance | Periodic wash; follow brand care guide |
| Moisture & pests | Does not rot; check physical damage | Treatment improves resistance; inspect exposed cuts | Naturally resistant, but not immune to decay | Formulation-dependent moisture resistance |
| Repair approach | Replace matching components; systems vary | Individual board replacement often feasible | Individual board replacement often feasible | Depends on proprietary system |
| Before buying | Check post spacing, UV data & wind rating | Check treatment rating & wood grade | Check species, grade & local exposure | Check structure, weight & warranty |
Why no universal lifespan row? A single number for each material can imply certainty that field conditions and warranties do not support. Compare the specific product warranty and expected maintenance separately.
How to Pick a Well-Made Vinyl Panel
To evaluate panel quality before purchasing, check the detailed component dimensions on the manufacturer’s technical data sheet:
Vinyl Fence Buying Checklist: What to Verify
Use this side-by-side checklist when comparing two panel kits or asking a supplier for details.
| What to check | Where to verify it | Why it matters |
|---|---|---|
| Actual panel size & post spacing | Installation manual; dimension drawing | Avoids buying panels that do not fit the planned runs |
| Post, rail & picket profiles | Component technical specifications | Compare equivalent components—not one thickness claim |
| Wind-load documentation | Product-specific test data and required reinforcement | A wind rating depends on the complete installed system |
| Slope compatibility | Manufacturer guidance for stepping or racking | Helps anticipate gaps and special components |
| Gate-post reinforcement | Gate kit manual and hardware requirements | Hinge loads may need a different post design |
| UV performance & color warranty | Published weathering specifications; warranty PDF | Product formulation and finish vary by line |
| Cutting & replacement rules | Installation manual and replacement parts list | Matters for short end sections and future repairs |
| Local permit & HOA approval | Municipal office, zoning code, HOA documents | Prevents buying noncompliant height, color or design |
Keep a copy of the product SKU, installation instructions and warranty before ordering. Approval and structural requirements vary by jurisdiction and fence system.
- Post Wall Thickness Specs: Load-bearing posts carry structural wind strain. Commercial and heavy-duty residential lines often utilize thicker post walls (for example, ~0.135″ to 0.150″ on certain heavy-duty posts) compared to non-structural interior pickets (~0.050″ to 0.070″). Always compare post wall specs relative to your local wind exposure needs.
- Internal Stiffeners for Windy Areas: In exposed high-wind areas, vinyl posts alone may flex. Check if the manufacturer requires aluminum or galvanized steel inserts inside hinge posts or gate ends to meet structural wind ratings.
- Sun Protection & Finish: High-quality vinyl panels integrate UV stabilizers throughout the material profile or in a durable outer layer to resist yellowing and surface chalking. Review UV testing specifications and warranty coverage rather than relying solely on manufacturing trade names.
Step-by-Step DIY Installation Overview
Always follow the specific manual provided with your fence system. For a detailed walkthrough of post techniques and tool requirements, refer to The Home Depot’s Vinyl Fence Guide.
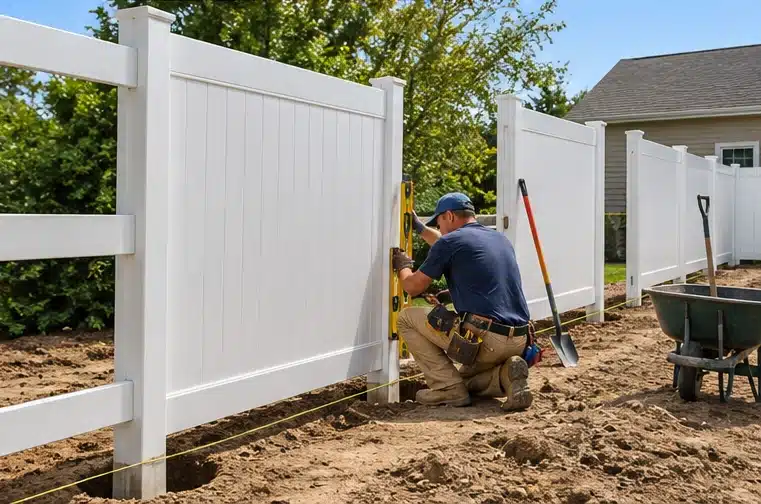
Here is the standard workflow:
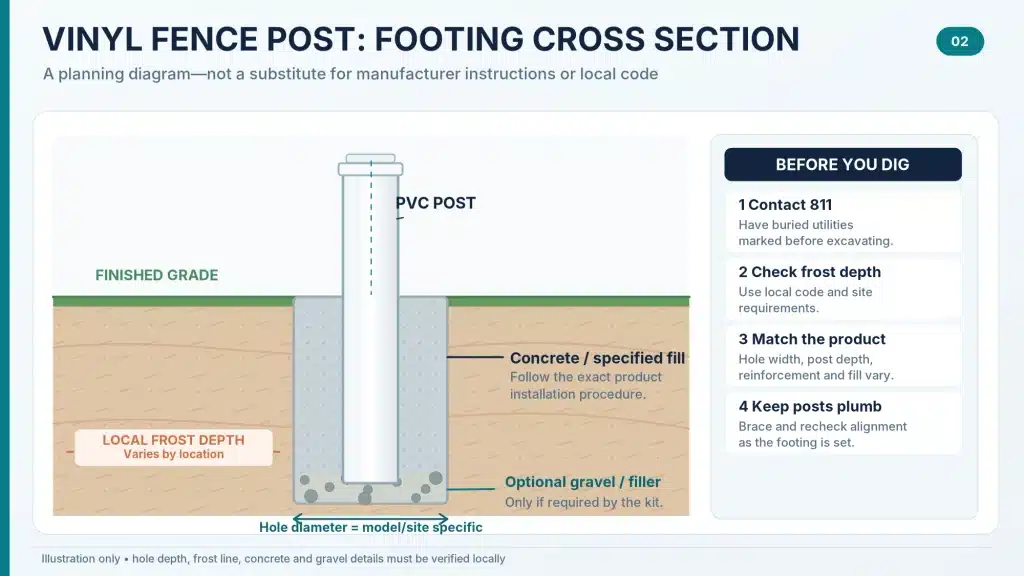
- Contact 811 Before Digging: Call 811 to have underground utilities marked. Required notice periods vary by state—Washington state requires a minimum of 2 business days, while Tennessee requires 3 business days.
- Set a Tight String Line: Run a tight mason string line 2 inches off the ground between corner stakes. Use the string as a reference to keep posts aligned.
- Dig Footings According to Manufacturer Specs: Dig hole depths and prepare footings as specified in your manual. Where recommended by the manufacturer or required by drainage needs, add gravel at the bottom. In northern regions, post footings must extend below your municipal frost line to prevent winter frost heave.
- Follow Recommended Assembly Order: Follow the installation sequence for your specific fence system. Some kits are assembled section by section, while others require setting posts before attaching panels. Always maintain recommended expansion clearances inside routed post channels for summer heat expansion.
- Hang Gates & Secure Post Caps: Mount gate hinges to reinforced posts, verify that gate posts are plumb so gates swing freely, and attach post caps using the manufacturer’s approved method (press-fit friction or exterior adhesive).
Common Mistakes Homeowners Make (and How to Avoid Them)
- Setting All Posts in Concrete First: If post spacing drifts by even half an inch early in a run, prefabricated panels will not fit into post slots. Test-fit panels or follow the manufacturer’s exact setting instructions.
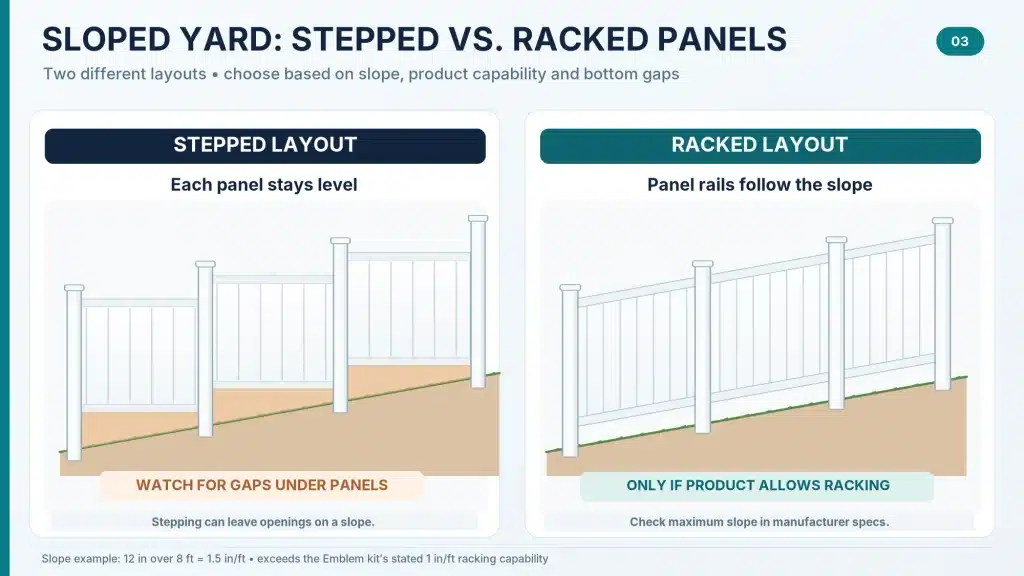
- Ignoring Slope (Stepping vs. Racking): If your yard drops 12 inches across an 8-foot section, check whether your panel model supports racking (tilting to match the ground slope). Systems that require a stepped layout (installing level panels like stairs) will leave triangular gaps beneath panels on sloped ground.
- Restricting Thermal Expansion: Fasteners driven rigidly through PVC pickets without expansion allowance slots prevent natural movement, causing panels to bow outward during hot summer months.
HOA Rules, Building Permits, and Property Lines
Before purchasing materials, confirm these local requirements:
- Local Height Restrictions: Municipalities commonly restrict backyard privacy fences to 6 feet maximum height, and front yard fences to 3 or 4 feet.
- HOA Aesthetic Standards: Some Homeowners Associations require the smooth, finished face of the fence to point outward toward neighboring properties or streets, keeping routed post seams on your side. Review your specific HOA bylaws prior to ordering.
- Property Line Setbacks: Local setback rules vary by zoning district. While some municipalities allow fences up to the property line, others require a setback of several inches to a foot. A professional boundary survey helps avoid property disputes.
DIY PROJECT PLANNING
Before You Install Your Vinyl Fence
Check these items before you order materials or start digging. The checklist is a planning aid—not a substitute for your product manual or local requirements.
01 Property & permissions
02 Measurements & materials
03 Installation readiness
How to Clean and Maintain Vinyl Privacy Panels
Safe Cleaning Practices
- Start with a Hose: Wash down panels using a standard garden hose and mild detergent.
- Pressure Washing Cautions: If pressure washing is necessary, follow your fence manufacturer’s cleaning guidelines and avoid concentrated spray that could etch the vinyl surface.
- Safety Warning on Bleach: Never mix household bleach with dish soap, ammonia, or other cleaning chemicals. Chemical mixtures release toxic fumes. If bleach is required for stubborn mildew, verify that your manufacturer permits bleach cleaning, dilute it strictly with water alone, and rinse panels thoroughly.
Frequently Asked Questions
How long does a vinyl privacy fence last?
A well-installed vinyl fence generally lasts 20 to 30 years or more. Leading brands back products with limited lifetime warranties, though specific coverage limits, pro-rating terms, and transferability vary by manufacturer.
Will a vinyl privacy fence save money compared to wood over time?
Vinyl costs more upfront than basic pressure-treated wood, but lower maintenance needs (no regular staining or sealing) may offset some of that price difference over time. Actual savings depend on installation costs, local labor rates, and how often a wood fence would require refinishing.
Can vinyl privacy panels handle high winds?
Some vinyl fence systems are tested for high-wind performance, but wind resistance depends entirely on product engineering, post embedding depth, and structural reinforcement. Always check the manufacturer’s wind-load documentation before buying if you live in an exposed high-wind area.
Can vinyl fence panels be mounted onto existing wood posts?
Mounting vinyl panels to existing wooden posts requires careful evaluation. Wooden posts warp and decay over time, which can cause rigid vinyl rails to twist or unlatch. Check system compatibility and warranty conditions before using existing posts, as manufacturers generally recommend matching vinyl or concrete-anchored steel posts.



1 thought on “Plastic Privacy Fence Panels: Vinyl & PVC Types, Costs, and Installation”
Comments are closed.